Scooter Drive for Mini
Oct 18 2004
I am now off on another tangent and now designing a mini-mech. A mini is a half height droid that was originally planned to come out of the Jedi Starfighter in Ep2. This idea was abandoned by George Lucas but it has fired the imagination of droid builders. It allows us to imagine what the body would look like. Since there were no actual screen droids the challenge is to design one and then make it look like it belongs in the SW universe. Also is allows the droid builder to use his or her imagination
On the previous page you saw the beginning of my body for my Mini. Since I am going to remain in 3 legged mode I have designed the drive system to represent this. I do not need 2 wheels in each side foot to balance the droid in 3 legged mode. I can then use larger wheels and have settled on the scooter motors.

1160.jpg
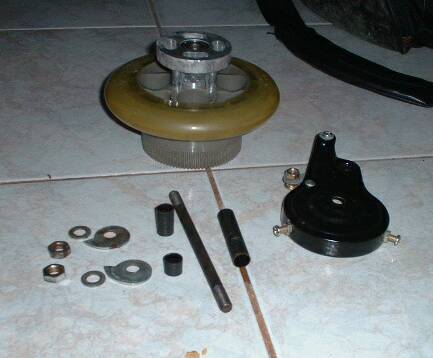
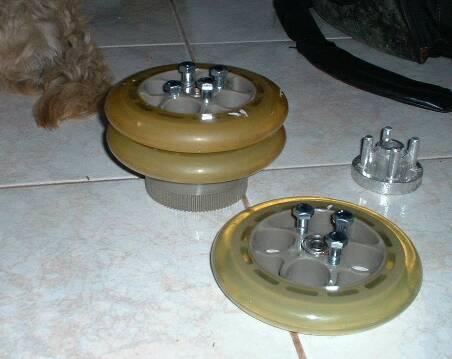
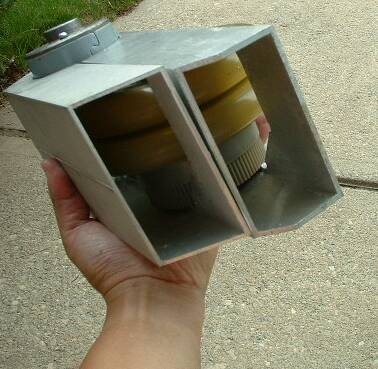
Here are the wheels that came with the scooter motors I purchased. The one on the back
is the drive wheel with the brake assembly still attached. The one in the front of the
picture is the front wheel and can actually be used.

1161.jpg
Here is my dog supervising my progress to make sure I do things properly.

1162.jpg
Here is the other side view of the rear wheel
1163.jpg
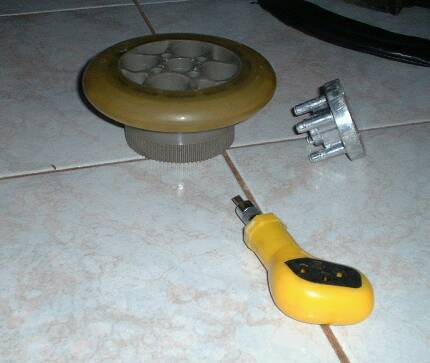
Here is the drive wheel with the brake assembly removed as well as the axel.
1164.jpg
It turns out the brake assembly is only a pressure fit and a screwdriver is all that is needed to pry it off
1165.jpg
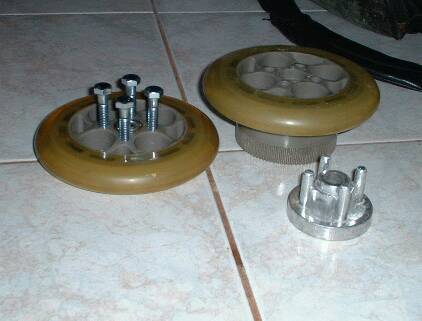
Next I take the drive wheel and I am able to thread some 5/16 bolts into the holes.
I actually had to run a drill bit through the holes to make sure the bolts slid in
1166.jpg
Tada. A simple way to have a dual drive wheels for more traction. Of course this
would increase side loads when turning but the motors should be strong enough for that.

1192.jpg
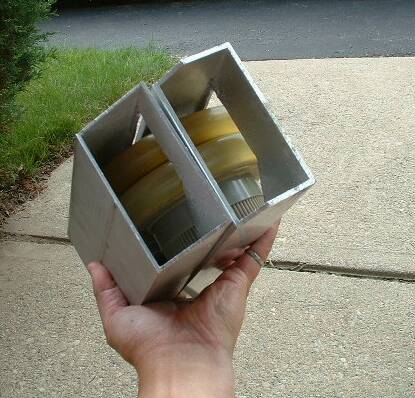
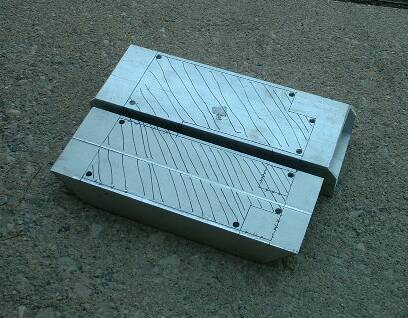
Now I need a frame of some sorts to be able to hold the scooter motor and wheel.
I have seen plate systems with various holes and spacers. A very simple system but
I was wondering if I could design something simpler. I came up with the idea of
starting with 2x4 aluminum rectangular tubing. It will produce a very rigid
frame for the scooter motors
Here are the main items ready to be cutout. I used a band saw at work for the initial cuts but a jig saw can be used with the right blade.
1193.jpg
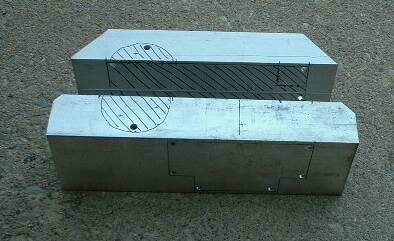
I have marked off the areas I will be cutting out according to the plans I have
laid out. I will use a jig saw to do the cutting and have drilled holes at the
corners to allow my jigsaw blade a place to start.
1195.jpg
A side view and the areas I am cutting out
1196.jpg
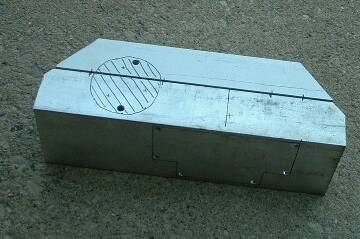
The round section is where the motor's ass will hang out
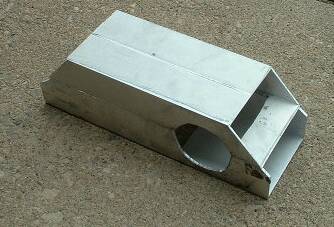
1197.jpg
An hour later I have cut pieces
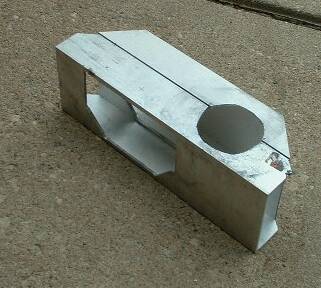
1198.jpg
The motor where it is going to be mounted later.

1201.jpg
How it will look when the 2x4 aluminum tubes are bolted together
1202.jpg
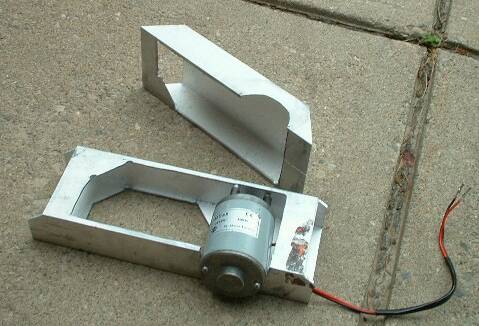
So the assembly process will be the mounting of the motor and wheel to one 2x4.
The other 2x4 is then bolted to the first one.

1203.jpg
One drive system
1204.jpg
Inside views
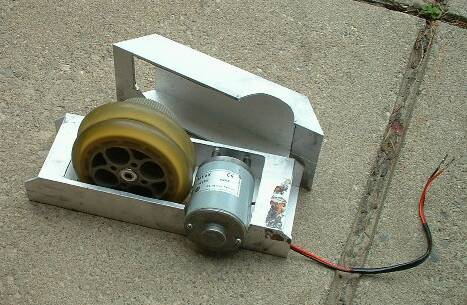
Well it turns out that one has very good belt tension while the other one is a bit loose. I am sure it will run but I am concerned that with high loads the belt may slip. I have also noted that the belt is very close to the aluminum frame so I will need to cut back on a couple of areas. The holes for the motor mount were perfectly placed. For the belt tension I am going to use the little items that came with the wheels. I just have to slot out the wheel axel holes and drill and tap to put in a set screw.
The next step is to mount the ankles. Since it is in permanent 3 legged mode I do not need a pivot point.