10th Doctor Who Sonic Screw Driver Universal Remote Battery Replacement
Manufacturer: The Wand Shop
March 31, 2022

History
The Wand Shop produced a TV remote control in the shape of the 10th Doctor’s sonic screwdriver from the BBC series Doctor Who.
This item was produced from scans of the prop sonic screwdriver given to the actor who played the 10th doctor when his time on the series had ended.
The Wand Company went through quite a bit of effort to produce the most accurate item available limited by production capabilities.
The results speak for themselves and was, at the time, the best value for money for an accurate 10th doctor sonic screwdriver.
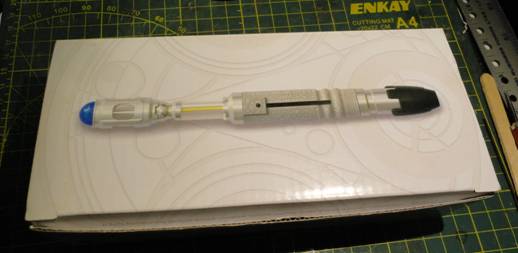
Box top
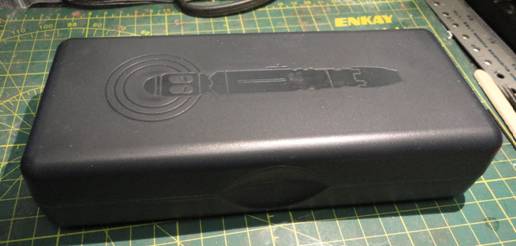
The plastic case
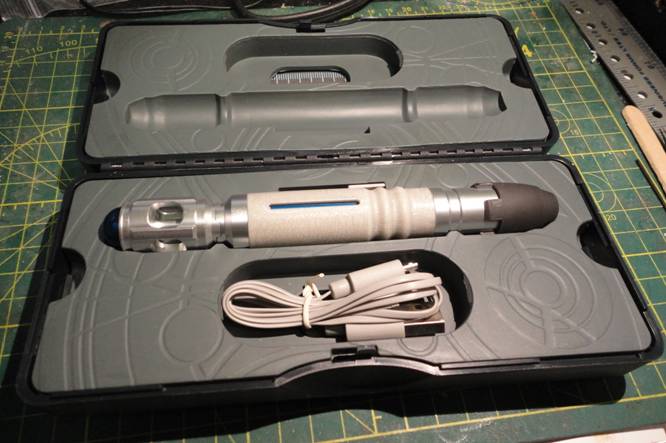
The inside foam container with the sonic. Base and instructions underneath.
The Problem
Throughout the design, prototype and manufacturing process the company did engage with the fans and demonstrated their passion for the project.
At the time, the description of the vetting, manufacturing and testing of the batteries sounded very thorough.
Unfortunately the reality was that the batteries had a problem that was only discovered after a period of time.
If left to sit for too long, without being charged, the battery charge would drop to a level where it would no longer want to charge.
If you plugged in the charging cable everything would work but once you unplugged it the thing would die.
When people started to have this problem The Wand Company would replace the batteries for people.
They then started to send out batteries to people with instructions on how to change the battery.
Eventually they ran out of batteries and could not offer anything to people.
Of course I found out about this only after I started having problems with my sonic screwwdriver’s battery not lasting very long.
I had purchased a second unit as a backup and when I went to check, it was completely dead.
At the time I did some looking around and there was no viable replacement and I was not able to find the original battery (300830).
A
couple of years later when I went back to the subject, someone had found a
replacement battery that they tried out and worked, (360821) so I decided to
give it a try.
Note: Thanks to phez on therpf for the method of going through the bottom and raptor0192 also on therpf for finding the battery I used.
Disassembly
The next problem was how to take the thing apart. Searching the internet was not too helpful.
Most people would take off the aluminum machined top at the emitter end.
The plastic body was snapped into the aluminum end piece.
Removing it required quite a bit of force and prying which often resulted in the end piece, body or both being damaged.
Someone did figure out that you could unscrew the bottom aluminum piece and access the battery that way so I decided to try that way.
Warning: If you screw up your sonic following these instructions don’t blame me.

1. Get your sonic
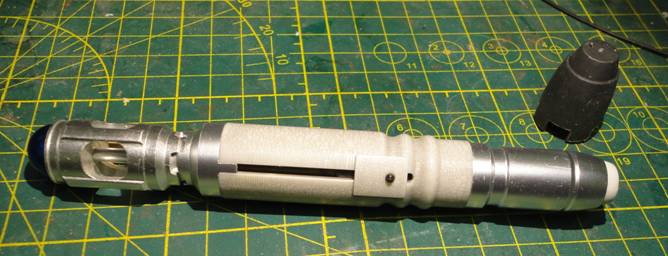
2. Pop off the end cap. It is just a snap fit.
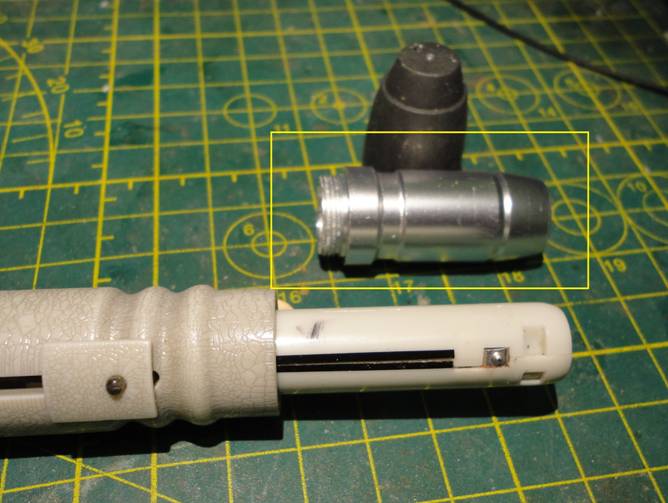
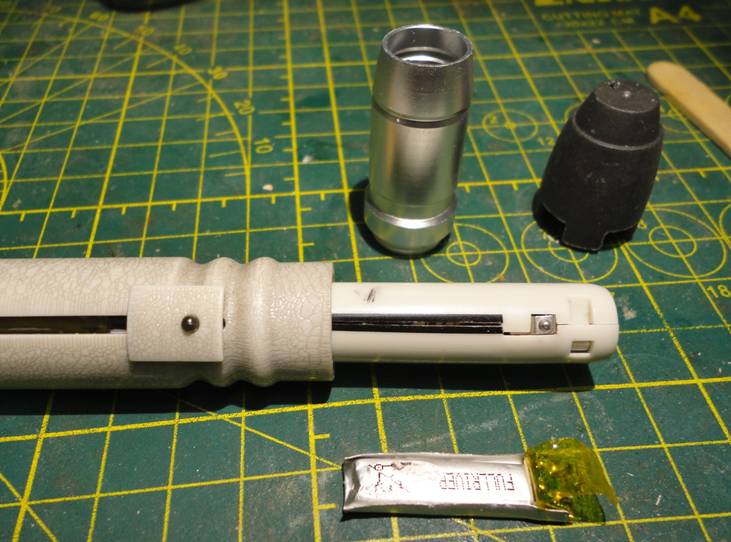
3. The aluminum bottom unscrews from the
plastic body.
This can take a bit of effort as it may be glued
in.
I had to put some masking tape on the aluminum part to get a better grip to twist it.
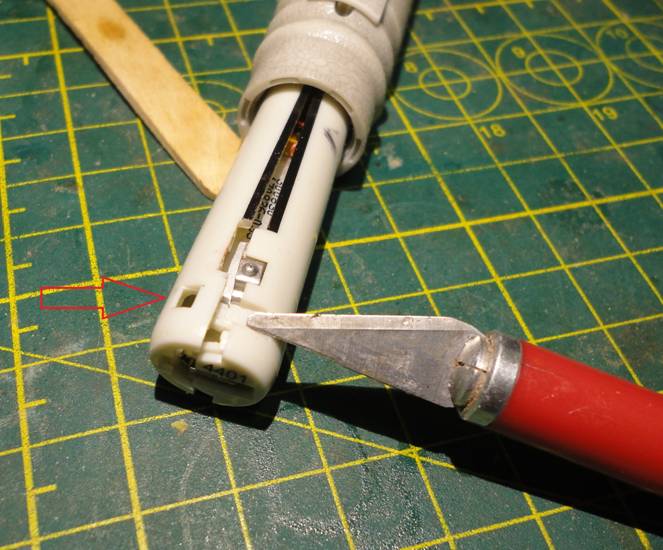
4. There is one clip that holds the
bottom together.
I used an Xacto blade with a broken tip to push the clip down to release it.
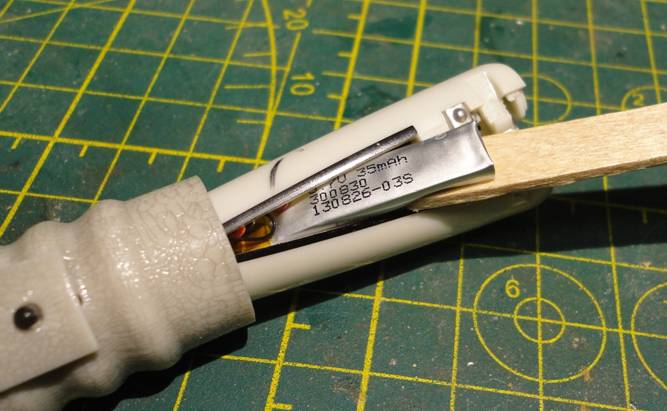
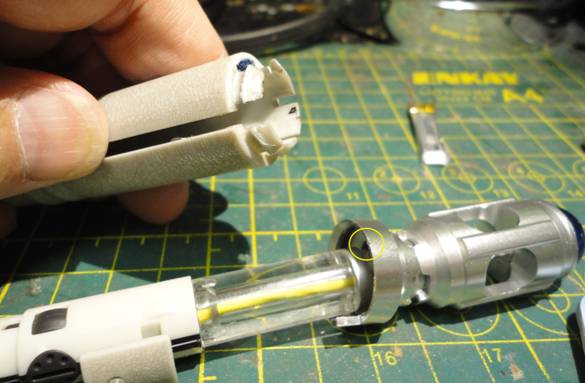
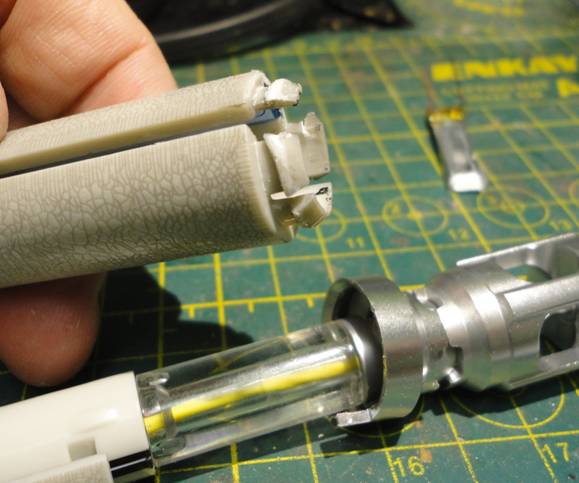
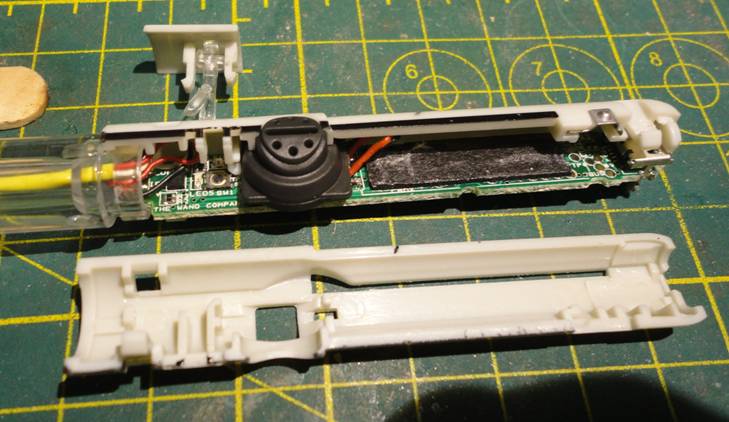
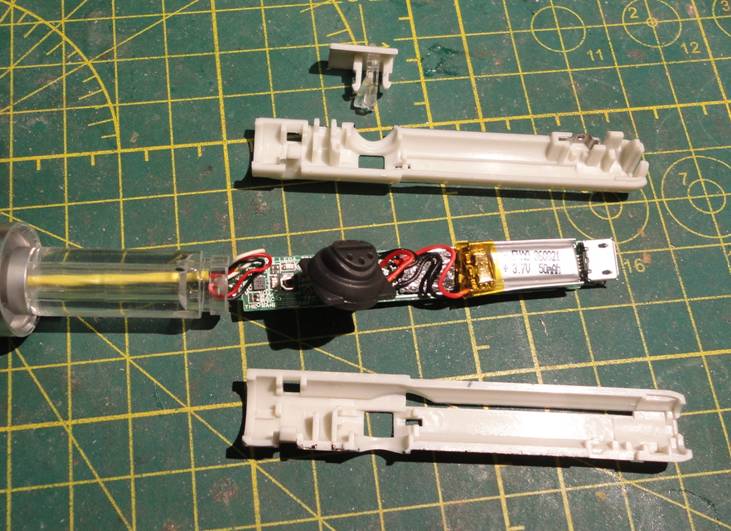
5. The two halves are forced apart and you can see the battery (3.7V 35mAh) You can also see the end of the clip that held the 2 halves together.
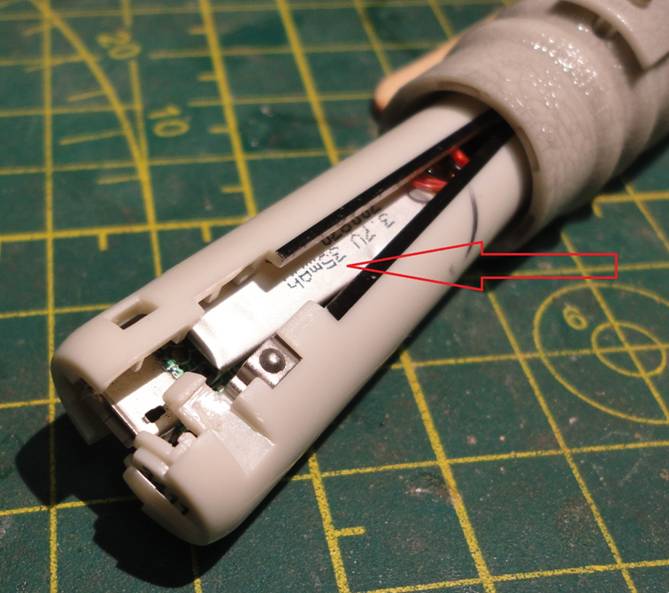
6. I used the popsicle stick in the back
to help hold the halves apart.
Here you can see the old battery model number (300830)
.
The battery is held in place by double sided foam
tape.
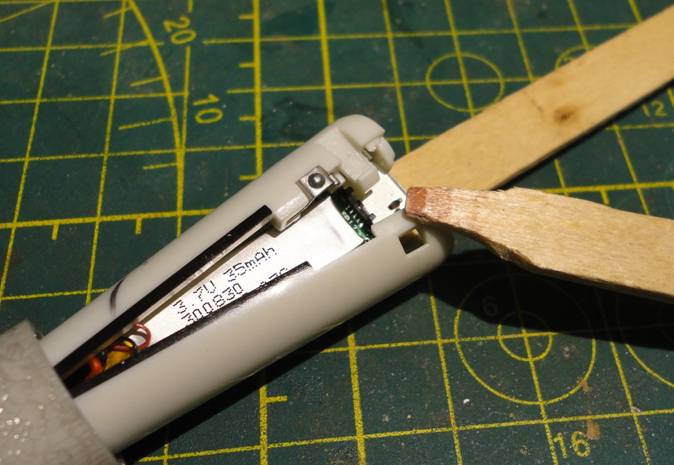
I shaped a popsicle stick to be used to pry the
battery off of the foam tape.
I didn’t want to use anything metallic for fear of damaging the circuit board inside or shorting something out.
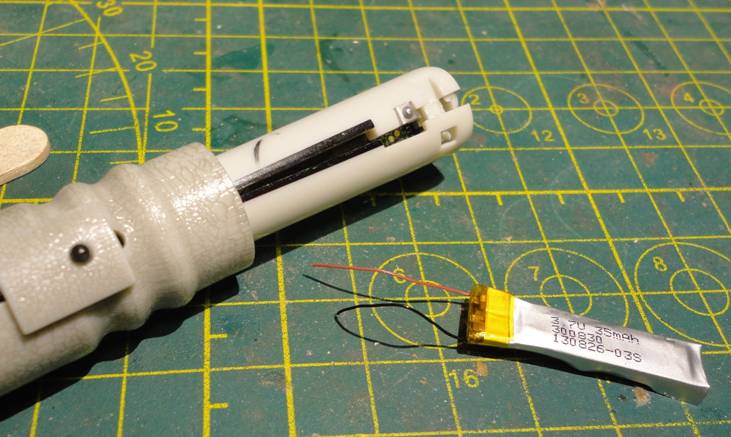
7. Working slowly, pry the battery out
until you can grab it to pull it out.
Work slowly as I will show you later what happens if you rush things.
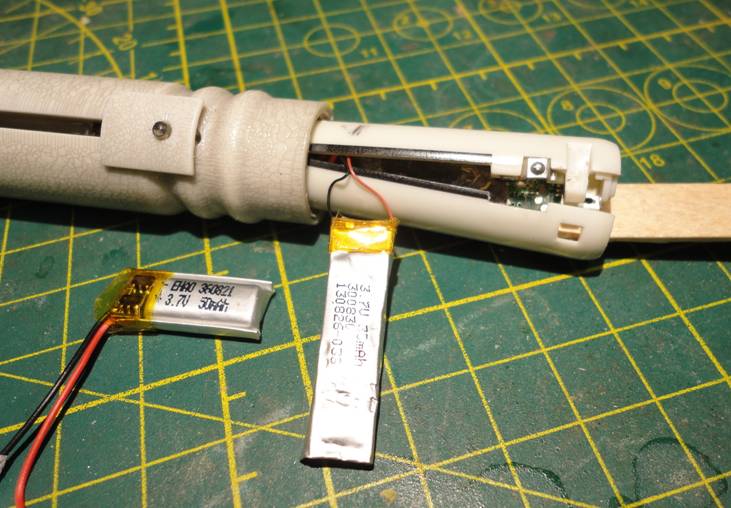
8. Here is the battery removed from the
body and the new one beside it (360821).
Even though it has a higher capacity it is
shorter. It is slightly thicker but it does not turn out to be a
problem.
With the old battery you peel off the yellow clear
tape to expose the ends of the red and black wires.
You can then
desolder the leads from the battery.
This is much easier then cutting the wires from the
battery and trying to strip the insulation off for soldering.
I then soldered the leads of the new battery to the
existing one.
I then used some heat shrink tubing to seal them up to prevent shorts.
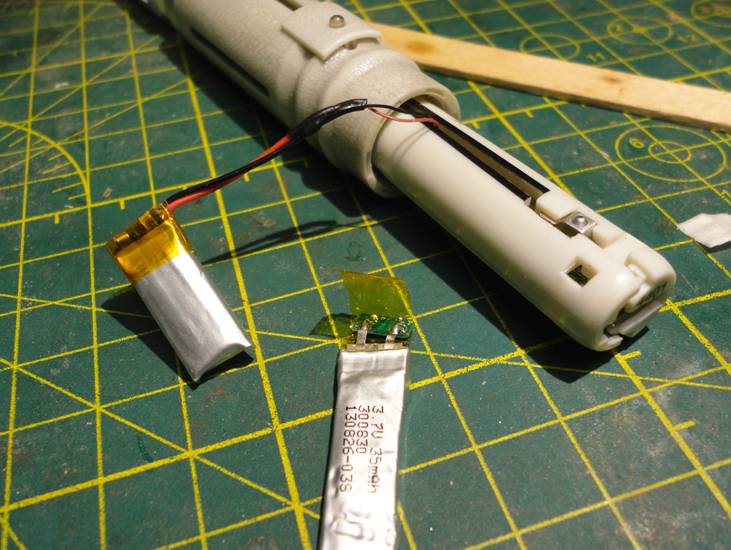
9. Here is the new battery soldered in
and the wires sealed with heat shirk tubing.
In front is the old battery with the clear yellow tape
peeled off and the existing wires soldered off.
Here is a good time to check to see that the sonic
works.
Better to check now than after you have reassembled everything.
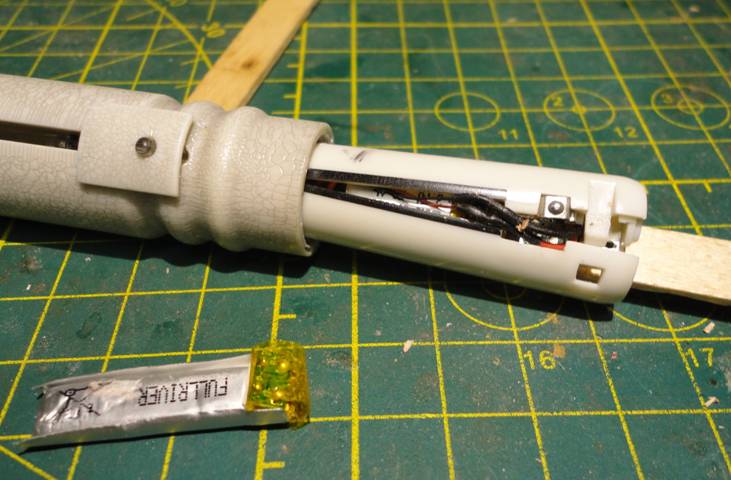
10. Next jamming it all back into the
body. The new battery does fit in without any other needed
modifications.
The further left you can push the battery the
better.
Later on you will see a photo on why it fits to the
left well.
Make sure the wires are all tucked into the body and will not get pinched when you close it all up.
11. All closed up and ready to be reassembled.
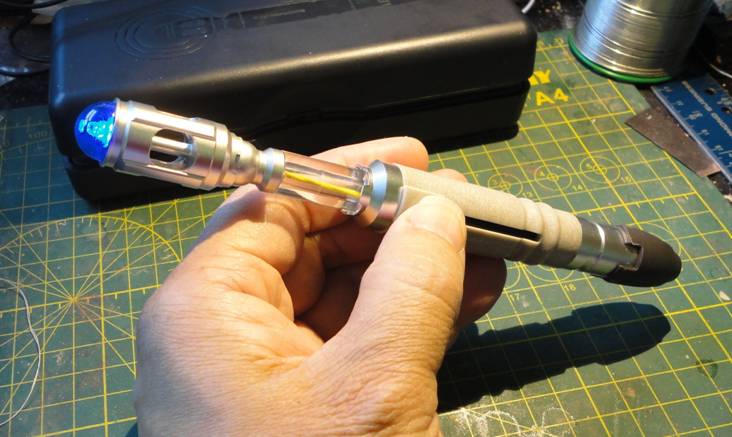
12. Sonic lights up and is holding a charge. I also charged it up to 100% and everything was fine.
Sonic Number 2
So I had purchased a second sonic as a backup when they were originally issued.
I had never charged it so when I heard about the problems with the batteries I went to the backup and the thing was completely dead.
No problem I thought as I had already fixed one sonic.
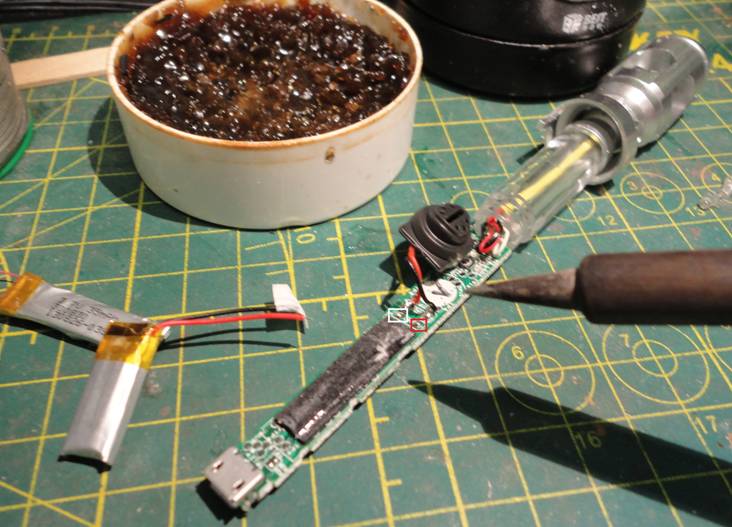
I went through the same process but I was confident I knew what I was doing so I was rushing things and I pulled too hard on the battery and I pulled it right out of the body.
I am screwed!!
This meant I had to take off the machined aluminum cap on the emitter side.
I knew this would require a lot of prying and force and there was a good possibility of damaging the aluminum end, plastic body or both.

I had this phone repair kit with some plastic tools I wanted to try.
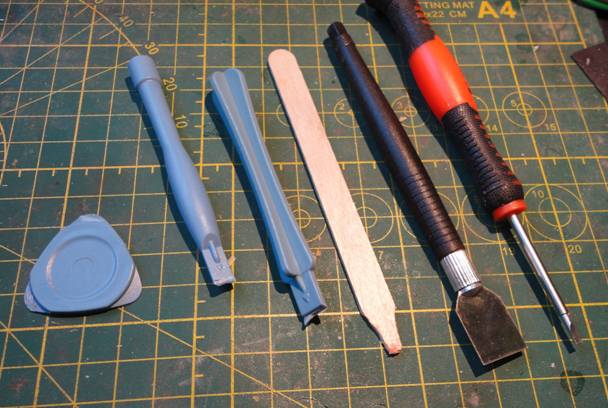
In the end these are the tools I used. I first tried the blue plastic tools to try and pry the end off.
can see that the second and third tools (from the left) have the ends broken.
I also tried my reshaped popsicle stick with no success. I finally went with the metal tools.
I put some masking tape on the ends to hopefully prevent damage and it was only slightly successful.
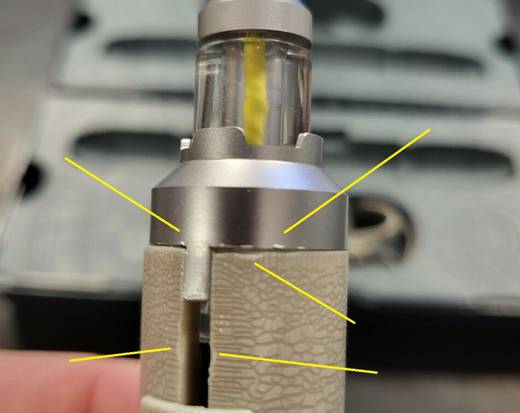
The end of the plastic body is all bent out of shape as I forced the aluminum end off.
Also circled is some slight damage to the aluminum end cap.
I have seen others who tried this and the ends are more damaged.
Another view of the chewed up clips as I pried the end off.
Here is a photo of a sonic from ebay where you can see the damage done when pulling the end off the body.
Reassembled the end cap does not sit flush.
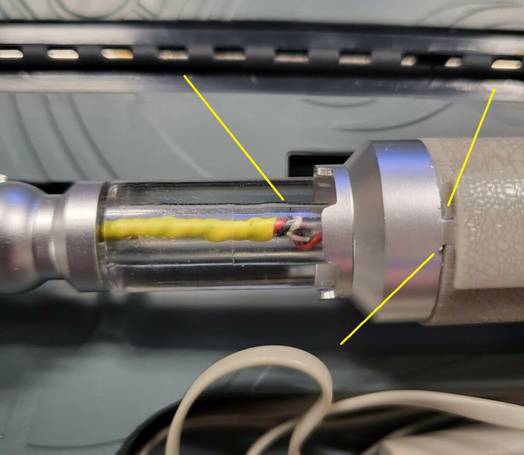
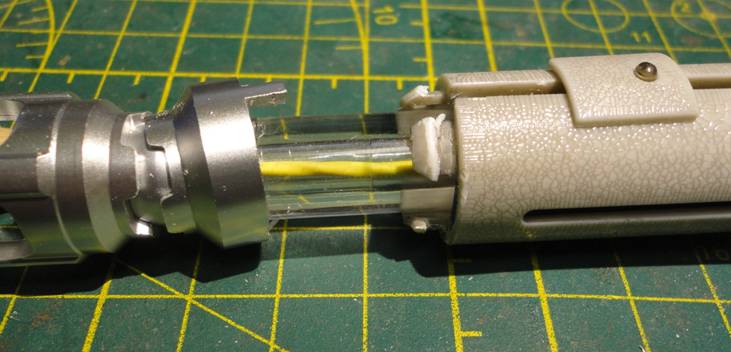
This one has less damage but you can also see that the wiring in the clear tube has not been put together correctly as you should not see the black, red and white wires.
With the end
cap off it was straight forward to access the circuit board. The bottom
(right) had one clip as shown in the first disassembly.
The top (left) had 2 clips that had to be unhooked.
The black thing in the middle that looks like a button, is the speaker. Be careful with the clear piece attached to the button as it can be easily lost.
You can also see the foam tape that held the battery in.
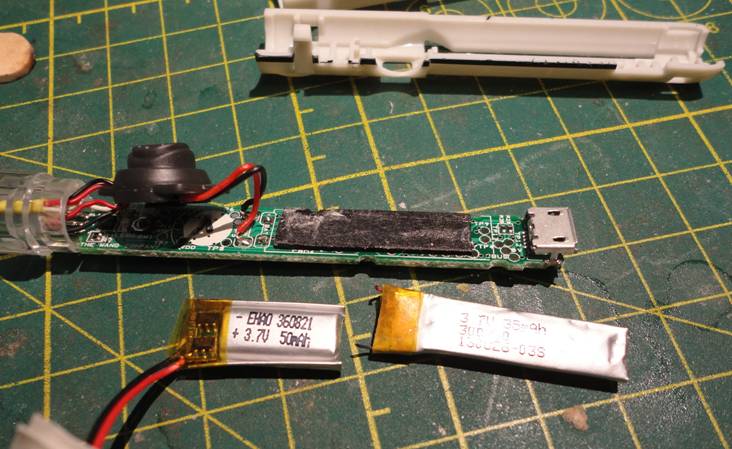
Old battery right. New battery left.
Note the location and colours of the solder points for the battery. You would think that the colours would match the speaker wires but they are reversed.
The new battery all soldered in. Test the sonic to make sure it works with the new battery after soldering.
All the pieces ready to be reassembled. Note: This will not be the final location of the battery as you will see in the next photo.
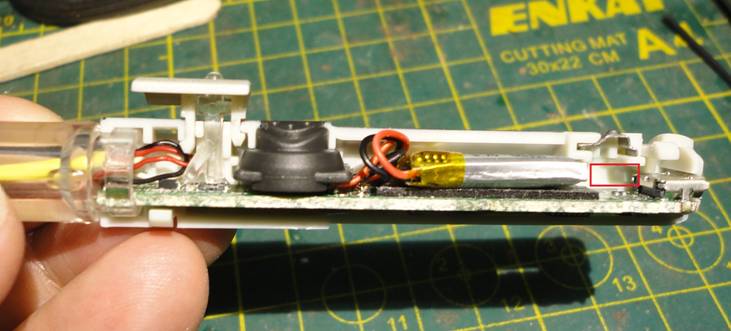
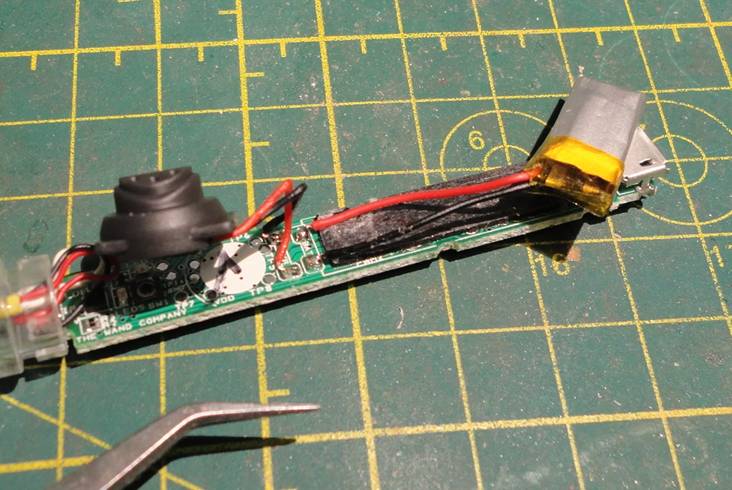
Almost ready to close it up but I did move the battery more to the left.
The old battery was thinner and fit under the red rectangular area.
The newer thicker battery will not fit under there but there is plenty of room to the left of it.
You just have to be sure that the wires are all tucked in and will not be pinched when the final piece is installed.
Also now would be a good time to test the sonic to make sure it is still working before closing it up.
With the bottom assembled it was now time to snap the top cap onto the body. This took quite a bit of effort and force.
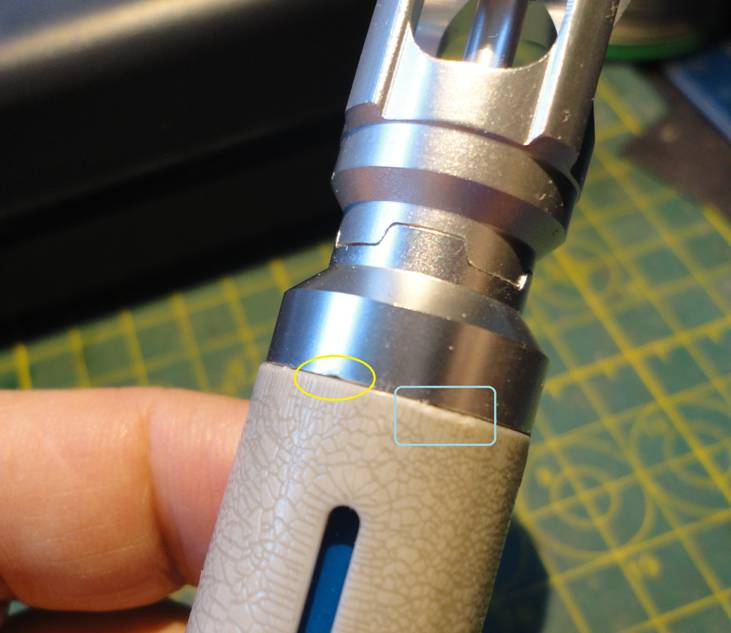
The final damage to the sonic. Very minimal but noticeable if you know what to look for.
Another problem with the sonic I used all the time was that the blue LED would sometimes not work.
If I pressed down on the blue dome that sometimes helped.
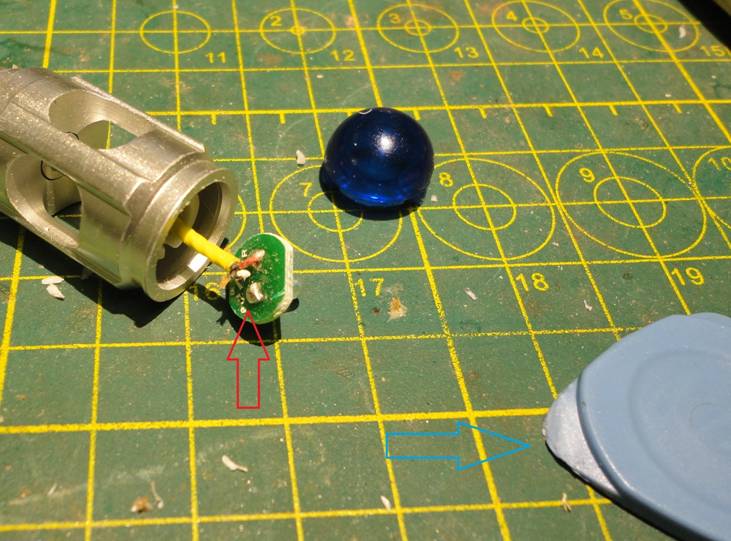
I figured since I was taking things apart why not try and fix the LED.
Using the blue prying tool I was able to pull the blue cap off without damaging the aluminum body.
This exposed the little circuit board with the broken black wire.
I added a small length of wire and soldered this to the board and everything worked again.
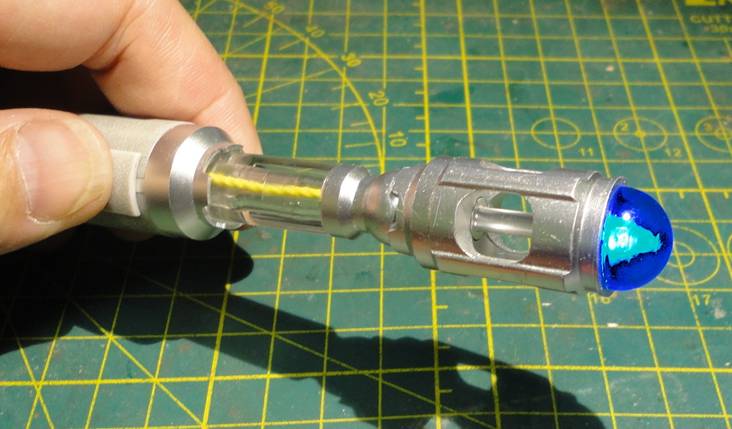
I was happy to have a fully functioning Sonic again.
Conclusion
If you have to replace a battery going in through the bottom is recommended as there is less possibility of damaging your sonic.
Having some soldering skills will be very helpful.
If you have questions you can email me: ask @ interlog(dot)com