Photos
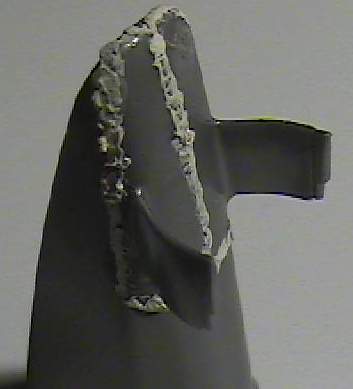
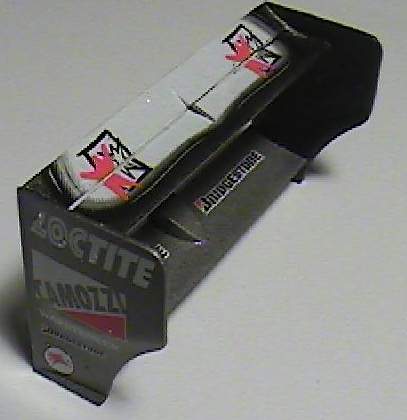
3 pieces make up the nose. Some filling needed here. I used Squadron White for putty work.
Tamiya 1:20 McLaren MP4/13
Oct 17th 1999
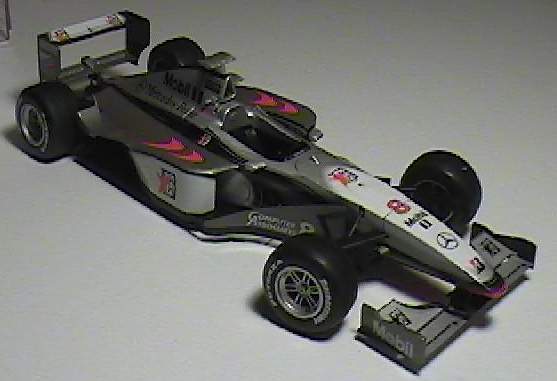
This is the 1998 F1 car driven by Mika Hakkinen and David Coultard. It was used to win the constructors championship for McLaren and the driver's championship for Mika Hakkinen
Good Points
Nice moulding
Grooved tires are very nice.
Bad Points
The decals are a disappointment as the shading on the car is done with a dot pattern that are very big.
The gradadtions between the white and grey, black and grey is too course. From a foot away it looks ok but on closer inspection it is obvious.
Complete painting instructions of the rear body panel not included in the instruction sheet but the paint separation lines are there.
The paint suggestion (XF-56) for the body is incorrect.
Notes
No "West" logos are included in the kit
No driver figure included in the kit
Step 1 - Undertray
The under tray comes with quite a few ejection pin marks on the upper surface. Care has to be taken to fill these in.
No problems here although parts B15 & B16 need to be filled. I wasn't sure if there was supposed to be any seam line between parts B26 and B25.
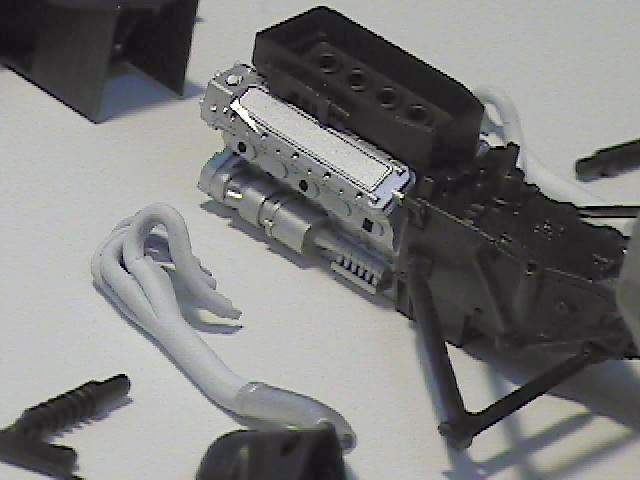
Step 2 - engine block, exhaust pipes, rear suspension
Surprisingly the engine block has seam lines that most do not have to be filled in.
Exhaust pipes need a bit of cleaning up to make look better. A little putty here also . Make sure the exhaust pipes line up as seen in the bottom of the picture because the bodywork comes really close to these pipes.
No major problems in this step. A lot of detail painting needed. Painting instructions show the headers as mixing chrome & clear orange paint. I would paint the headers with a chrome paint (not Tamiyas) then go in with the clear orange in certain spots to add detail.
Step 3 - Engine and undertray
A little wiring can be done here to add a little detail. The airbox covers the intake trumpets so if you fix the airbox on you do not have to paint the inside.
Step 4 - Engine and body panels
Here is where the exhaust pipe assembly in Step 2 comes into play. If done properly this step is relatively easy. I needed tweezers to put the parts in
Step 5 - Rear suspension, drive shaft
Again no problems. Some more detail painting or you can do some scratch building and add better looking springs. Instructions do not show it but I am sure that half of th4e shock cylinder is supposed to by chrome. Not easy to paint.
Step 6 - Rear brake assembly
Out of the box this is no problem. Watch that each disk brake is for a particular corner of the car.
For those detail nut there are quite a few wires in this area. You can also add carbon fiber decals to the entire hub assembly. While you are at it you can separate the disc from the caliper and detail these out. Don't forget to drill out the disc and brake lines.
Step 7 - Rear brake assembly and engine
Watch the lower mounting point. Because if the paint buildup the lower arm did not easily side into the hub. The top pivot point was also a bit tough to pop in.
Step 8 - Monocoque and seat
Not sure why but after assembling the seat in the body halves I had problems with the cockpit surround (part A30) hitting the top of the seat. Repeated test fittings showed the same problems. Only once during a test fit did the entire thing go together well.
Reviews in magazines have suggested cutting the bottom of the monocoque out to allow the seat to be assembled from below after painting. This would eliminate the problem I had with assembly.
The seatbelts are provided as decals and should be replaced with aftermarket items. I prefer this over the moulded in seatbelts.
A bit of puttying and sanding here to make the body look good. Because the seat is installed before the halves are glued together and painted I had to stuff paper towel in the cockpit to make sure the paint does not get inside. I have heard you can cut out the bottom so that the seat assembly can be installed after painting but I didn't try this.
I was not able to get the MS-5 paint so I used the recommended Tamiya XF-56. This was a big mistake that I didn't realise until I started to apply the decals when it was too late. A closer colour would be their Gun Metal. And because the XF-56 is flat I had to clear coat before I could add the decals.
Masking is no problem since they do give you masking guidelines.
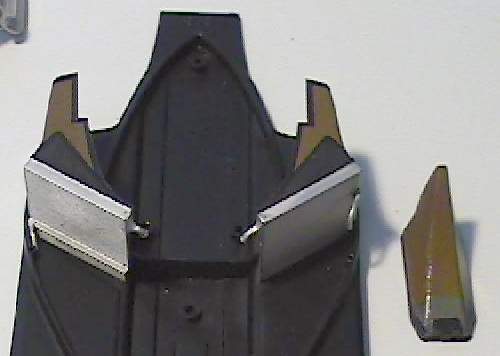
The little flaps on the side of the rollover hoop (Parts A38 &A 39) could use a little work to look more realistic. I thinned the edges with files and an Xacto knife.
For those detail people look for a close up of the steering wheel. There is a ton of wires and such here. A project by itself
Step 9 - Rear bodywork
Putty and sand. Make sure the nose wing mounts match up to the front wing. Also make sure the rear body mounting points will fit down on the chassis.
Step 10 - Decalling body
Decals galore. I will have to warn you now that Solvaset will eat these decals. If you accidentally use it, do not touch the decal or it will melt. The decals area also thin so the edges do flip over sometimes.
Trim edges of decals all the time.
On decal 3 for the nose top I had problems getting it to sit in the NACA duct. It actually ripped.
Decal 1 was not an easy fit since there was a lot that had to curl together. Pinting would look nicer but the decal is the fluorescent orange with a fade to black.
Be careful when lining up the decals from the body to the rear cowling. Slight misalignments are very obvious. If you can somehow temporarily attach it to the floor pan this would help line things up
Step 11 - Monocoque to undertray, windscreen
Save the windscreen until the end
Step 12 - Side radiators, airbox
No real problems with the kit parts.
For more detail you can add wiring to the electrical boxes (parts C29 and A8). Note that if you add wiring you will have to check that your body can still be installed without interfering with the wiring.
Decals for the airbox are a different colour from those seen in references
I don't know why Tamiya hasn't included the rest of the radiator hosing. These are very simple pieces and would attach to parts A21 and A11. I used solder to make these pieces.
Step 13 - Wheels and tires
This was a relatively quick build so I did not spend as much time on the tires as I normally would.
Tamiya gives you 5 sets of tire stencils instead of 8. This also means that only one side of the tire has the logo on it. The extra one is for if you goof up. Thank goodness for the extra set. Once the decals are on the tire they do not want to move around. Any attempts to move them results in a ripped decal.
A friend suggested the following method
1. a clear coat on the tire and let dry
2. add water
3. place the decal on top
4. move it around to the correct position
5. press down and remove excess water with Q-tip
6. let dry
7. clear coat over decal and then a semi gloss coat.
For extra detail you can add valve stems. The wheels also have a lock on them that is not included on the model. Not sure how scratch built these since they are small items.
Step 14 - Barge Boards
In this step I used a slower setting glue to allow me to position the barge boards.
Step 15 - Front suspension
I had problems with parts C12 and C13. With the front suspension on the nose cone would not go on. Slight modification to the nose cone fixed this.
Fitting C11 to the kit was a bit fiddly but one in the fit is perfect
Step 16 - Front suspension and brake assembly
I did have problems snapping the wheel hubs to the suspension pieces. I found this surprising since this is normally well engineered by Tamiya
Again for detail you can add wiring and carbon fiber decals
Step 17 - Rear & front wing
Not much exciting here. For detail you can add carbon fiber decals to the wing end plates.
You should be careful with mounting the front wing to the nose. Make sure everything is level with the body.
Step 18 - Front rear wing, mirrors, cameras
I noticed that the front nose and rear wing are a nice flush fit and do not have to be glued on.
For the mirror faces I use an aluminum sheet that has a chrome finish and clear coated. It is about 0.010" thick and was purchased at a hobby store. Thicker than bare metal foil.
The camera at the top of the car (part A24) needs some careful painting. It should have been done with a decal like the other camera.
I found the side camera (Part A7) wanted to sit at an angle. Make sure this is parallel with the ground.
Step 19 - body assembly
The body does fit on the body but make be careful or you may scratch the paint on your suspension or body.
Photos
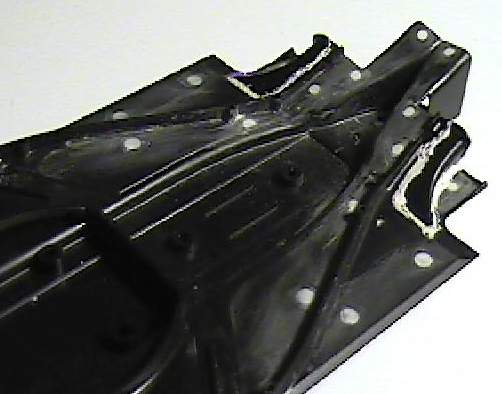
3 pieces make up the nose. Some filling needed here. I used Squadron White for putty work.
Winglets on side of body are items glued in. These also need putty
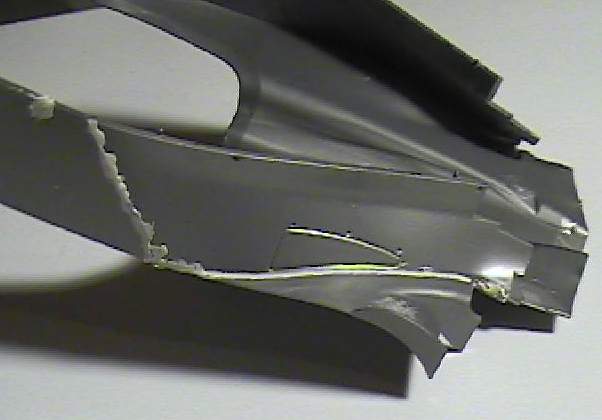
Rear part of body are separate items to be glued and puttied. Some time aligning the kit parts will save later on the amount of putty needed to fill the seam.
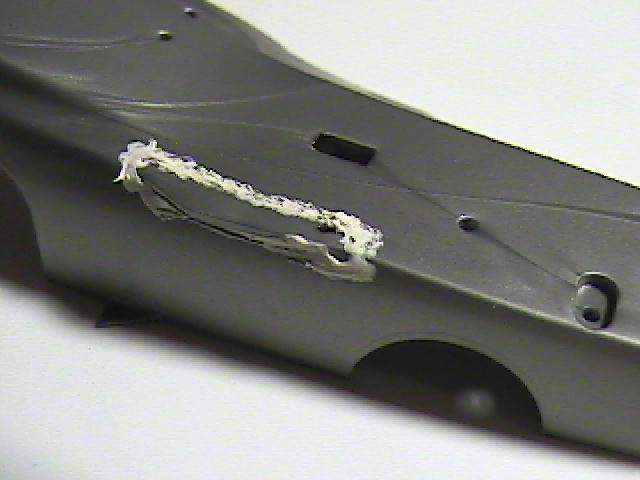
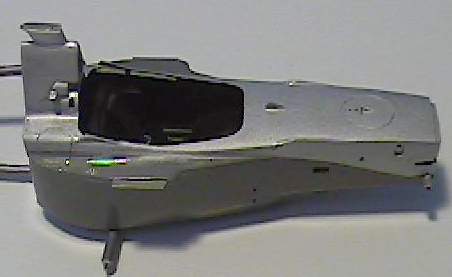
4 parts are glued to floor pan. Note also the numerous ejection marks that have to be filled in
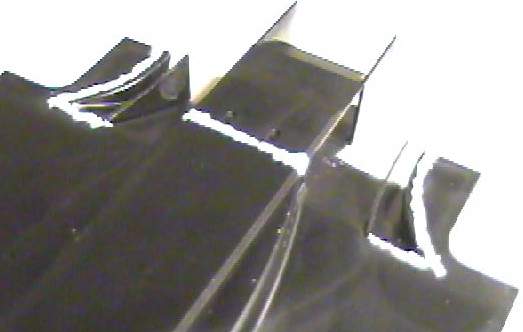
The underside of the floor pan and some filling. I am not 100% sure if the middle seam in the wooden plan has to be filled in or not. Again if you take your time with aligning parts you will need very little putty to eliminate the seams.
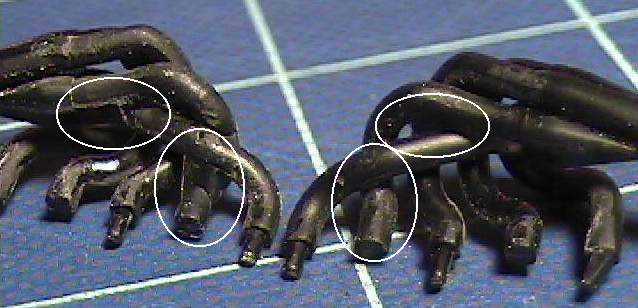
The exhaust piping with some minor modifications to make them look better. The one on the right has been slightly modified.
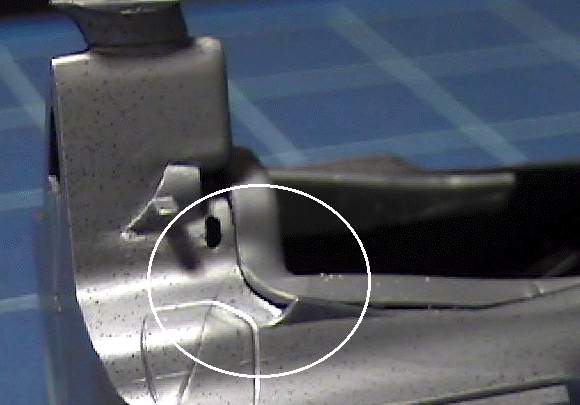
Had problems with the cockpit surround fitting into the tub

Problem was the bottom of the surround hitting the top of the seat. During test fitting this was always interfering. Only once did it appear to fit together. I had to modify the cockpit surround since I had glued the seat in already. Aftermarket seat belt set used.
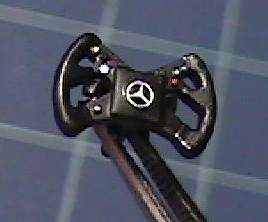
Close up of the steering wheel. Some detail painting here.
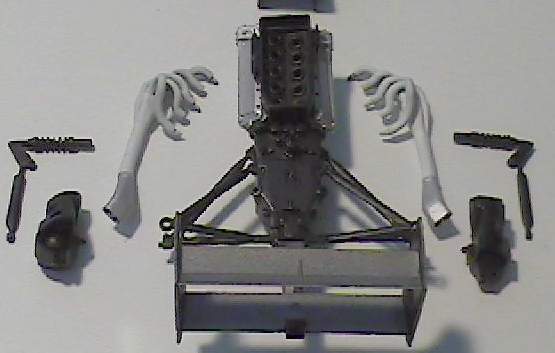
The engine and bits. Headers have not been painted chrome yet.
A side view of the engine and bits
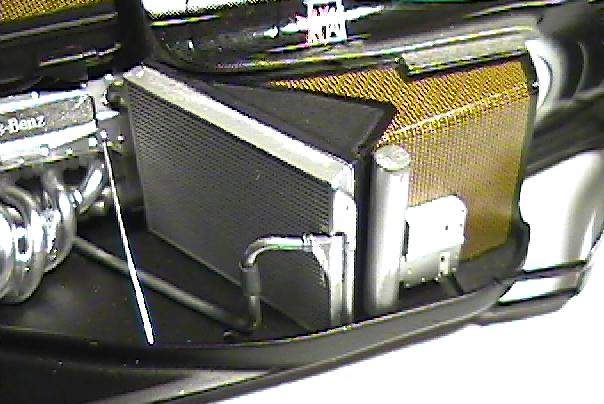
The floor, air box and side pods. The brown stuff is carbon fiber decals included in the kit. Notice the two outer radiator connections. Tamiya should have included in the kit, the hoses to connect up to the engine since they are relatively simple and they look really stupid just hanging there.
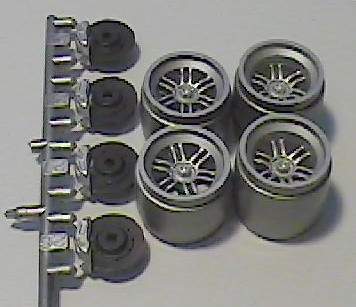
Wheels and brakes
Tub with the two tones paint job. Found out too late that the paint that Tamiya called for in the instructions is too light. (XF-56)

The two tone body cowling. The instructions do not say to paint the two colours but the separation line is included on the part.

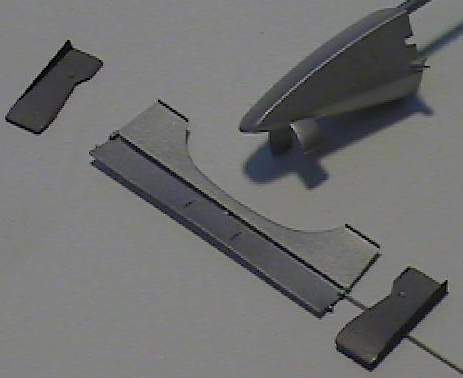
Cockpit surround and the side barn doors.

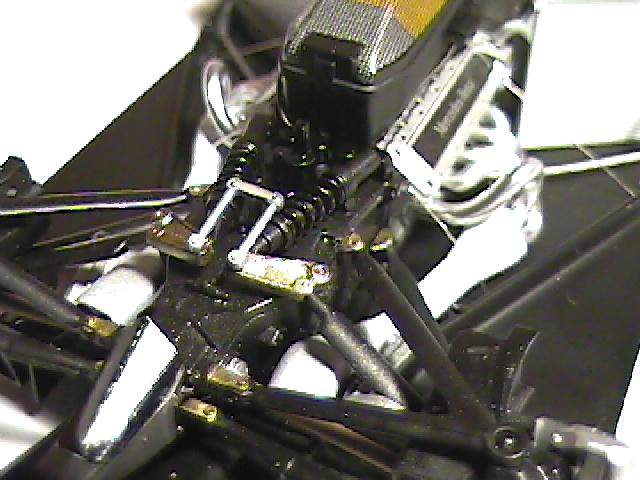
Front suspension parts
Front nose and wing. Note the front nose will have to be painted the two colours. I haven't done it yet.
Well quite a leap from above but here is the monocoque basically done. The white decal actually looks good in the picture
3/4 view of the finished monocoque.
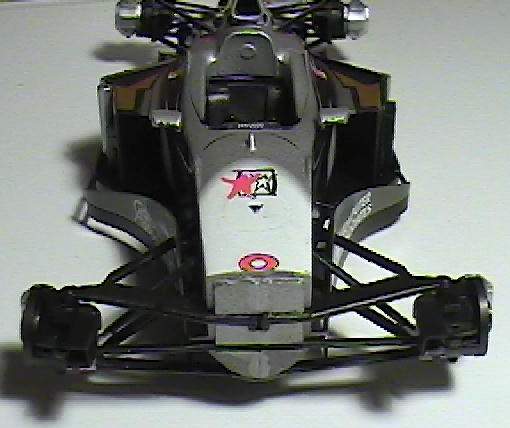
Close up of the front suspension

Side view showing the minor wiring done to the electrical box and two wires added to the engine area. The two wires added to the engine area is not 100% correct. I took the wires to the edge to make it easier to hide. Also a rod has been added to the radiator hose straight to the engine block. Here you can see the pattern on the decal that goes on the side pod.
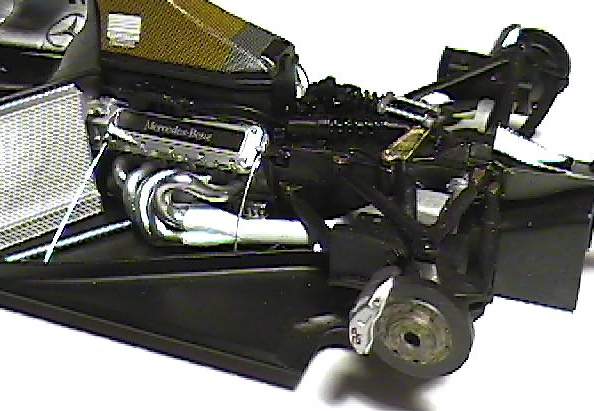
Engine area with the chrome exhaust. No clear orange tinting has been added. Instructions do not call for it but I added red to the "AP" logo on the brake calipers. The wire to the under tray on the right side hits the exhaust pipe so it isn't 100% straight.
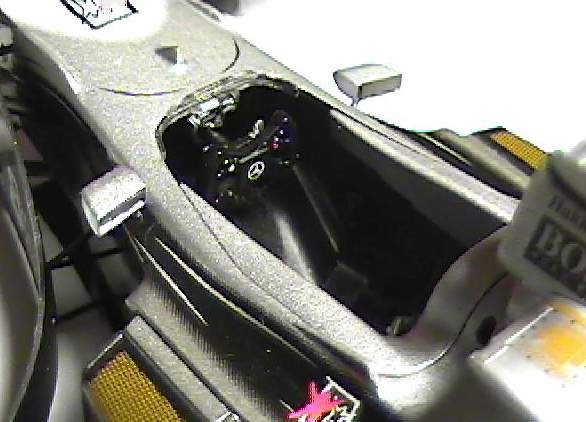
Close-up of the cockpit. Here is a good shot of the black dot pattern on the decal.
Here is the other side of the car. No wiring added here. You can also see the simple radiator hose added here and the undertray support wire.
Close up of engine. Just detail painting done here.
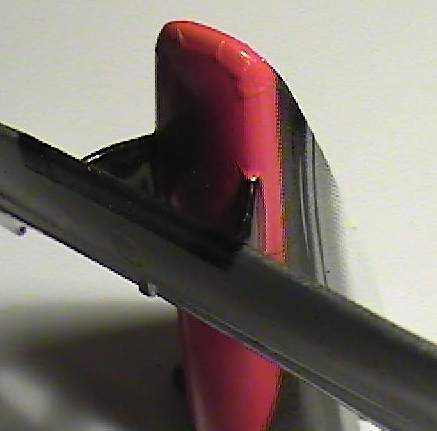
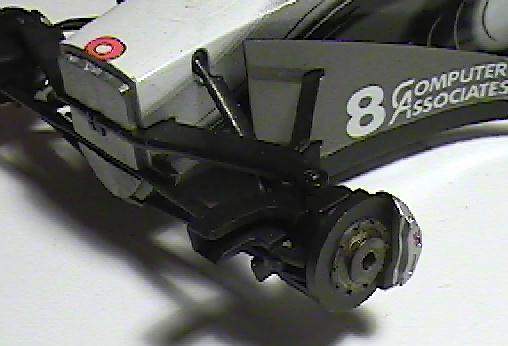
The front nose with the fluorescent decal. You can see how much it has overlapped to conform to the nose.
Rear wing all decalled up

Side view without the nose or rear wing
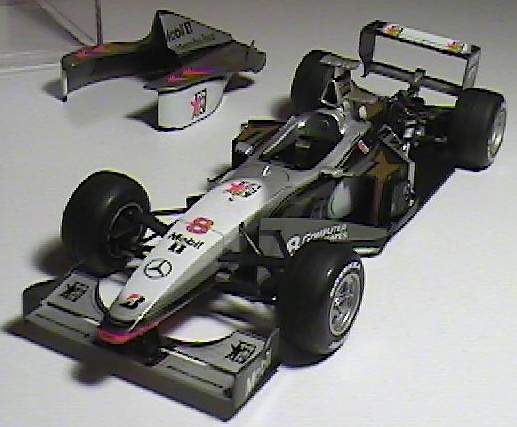
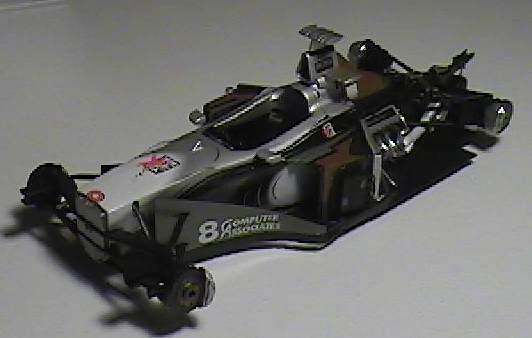
All done. A very sharp looking car but you do notice the narrow width of the car

Second view
Final Comments
Had a couple of fit problems. I haven't heard of any others having these problems so it may be just me. Decals could have been better. Besides the XF-56 paint code the instructions were very good. For the correct colour use the Tamiya spray can. If you can not get this then mix Tamiya black with the XF-56 until the desired colour is reached.
Overall a very fun car to build and a World Championship car too.
Return to Home Page
http://www.interlog.com/~askSend comments, suggestions etc. to
ask@interlog.com