1:20 Jaguar 2000 R1 - Aug 7th 2000
July 2 2000
This is a custom decal project. Another F1 modeller and myself are working on decals to allow us to convert the Tamiya McLaren MP4/13 into the 2000 Jaguar R1 car.
Original artwork was done by Graham O' Donovan gradee@esatclear.ie Using this artwork I did a bit of tweaking and refining to get the first generation of decals. I printed the decals on my ALPS MD-1000.
Of course the McLaren MP4/13 is not a 100% match to the Jaguar. Here is a list of items I noticed that differ from the McLaren and Jaguar
Differences between the Jaguar and McLaren
1. Front tires have an extra groove for the year 2000.
2. Wheels are incorrect
3. Front supports for the wing is incorrect.
4. Side pod radiator inlets have the incorrect profile.
5. Rear body separation lines incorrect
6. Distance between the head protection foam and air intake box should be larger.
7. Side body flaps in front of rear wheels incorrect
8. Front wind endplates incorrect.
9. Rear wing incorrect
I am sure there are quite a few more but these are the ones I noticed so far. No.s 3, 4 and 7 I have modified and the rest I will not worry about.

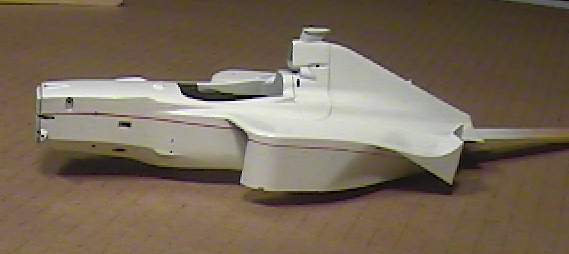
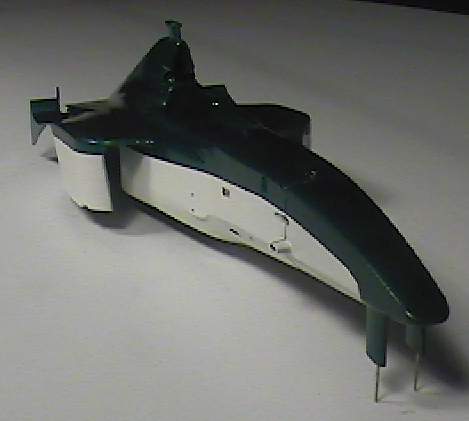
Picture #2: Here is the Tamiya kit with some body modifications. The white styrene are the obvious changes.
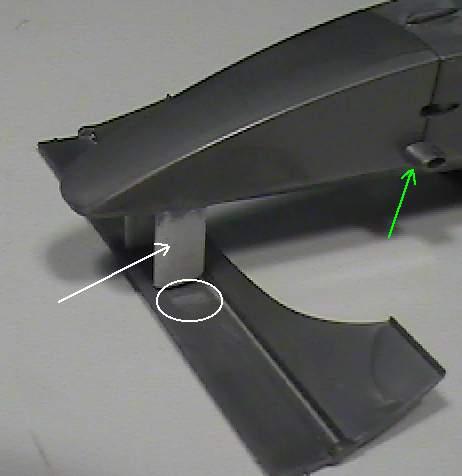
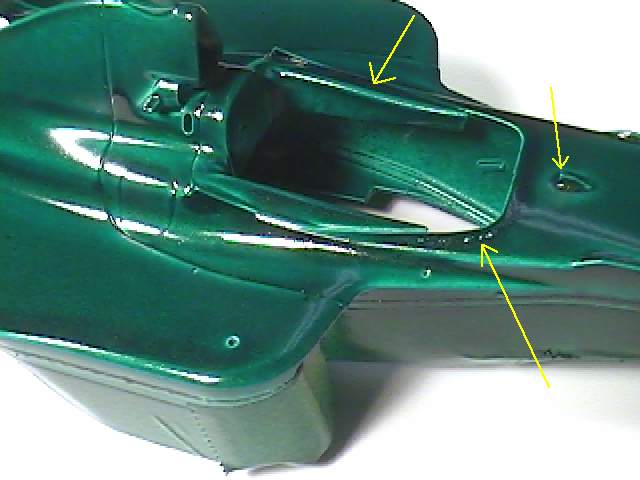
Picture #3: Close up of the changes. The white oval is the kit mounting point filled in with putty. The white arrow shows the wing mount that has been scratch built out of styrene. The green arrow shows the bodywork that is incorrect. This bodywork is present on the above suspension hole . I have chosen to leave this as is on the kit to speed up the project.
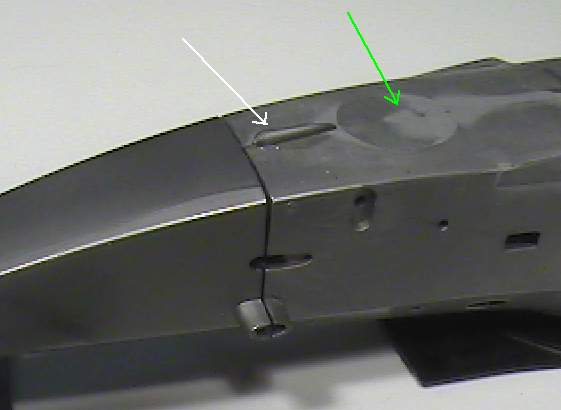
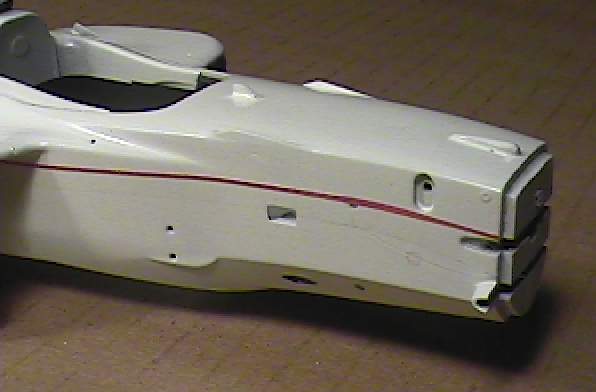
Picture #4: The white arrow shows a blister that was scratch built using extra Tamiya kit sprue. The green arrow shows the panel that has been filled in. There is a different shape access panel here but I have not been able to find clear references to add it. I may add it later as a decal if I find good resources.
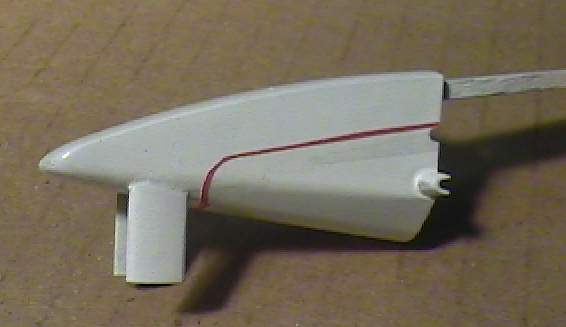
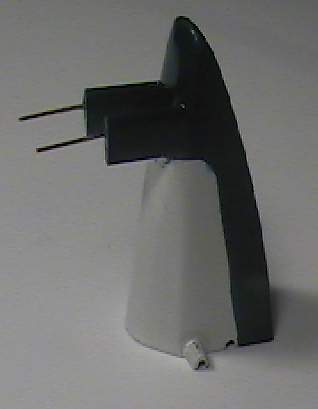
Picture #5: This modification is needed since the number of the car is located here. The kit flap is too small.
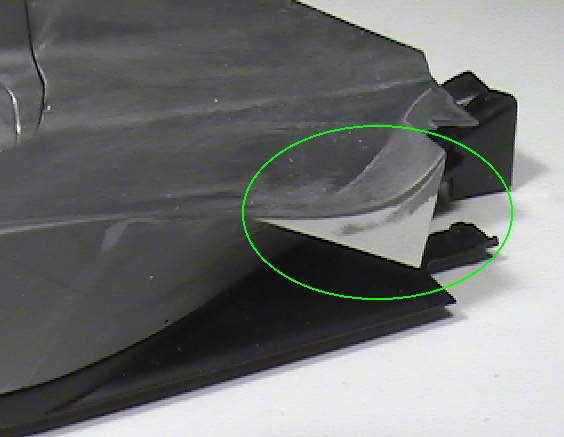
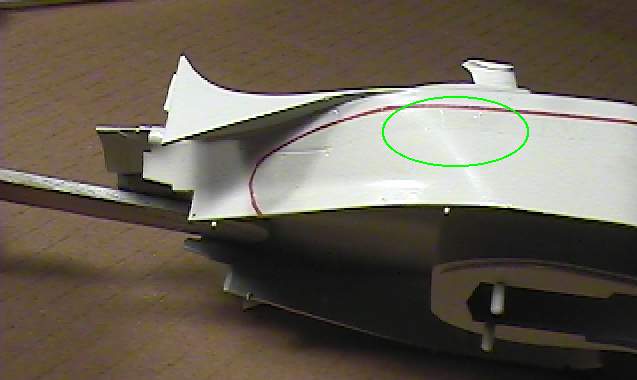
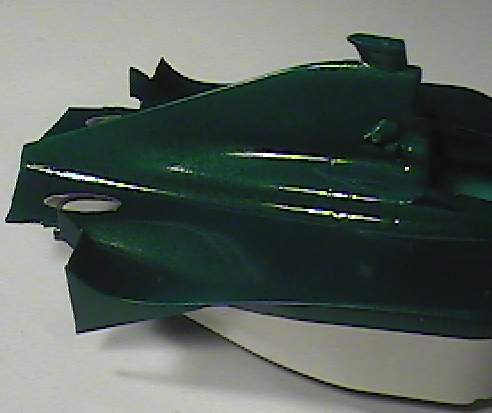
Picture 6: The Jaguar bump (in green circle) is actually a different shape than what is shown here. To be accurate the kit blister will have to be sanded off and a new one scratch built. All I did here was file the tip off the kit blister.
Picture #7: The next several pictures is my first attempt to mask the white portions for painting the metallic green of the car. I printed an extra set of the red separation stripes and cut these out to use as masking templates. They look good but I found later on that it was very hard to remove the decals from the body when they are dry. I thought using masking take to try and rip off the decals would make this fairly easy. Boy was I wrong
Picture #8
Picture #9
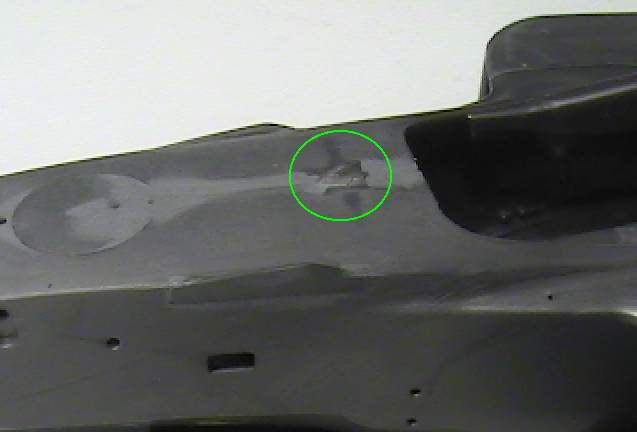
Picture #10: The green oval shows where an access panel should be. I only noticed this when looking at new references. To speed up my project I have decided not to add this. Again maybe a decal later.
Picture #11: As always I have no time to do the job right the first time but lots of time to do it a second time. After masking I decided to paint the model with the paint straight out of the spray can. The paint I used was a Testors Green Metal Flake 1630. Straight out of the can the paint started to pool in certain areas and I knew right away I was in trouble. The paint didn't cover evenly and a second coat made this even worse. High spots were almost white while areas where the paint pooled was dark green.
I knew I would have to strip the paint and start again. This sort of got me depressed and I did not work on the project for a couple of weeks. It was while stripping the paint that I noticed that my decal masking idea wasn't as good as I thought it would be.
While attending the Canadian GP I noticed that in bright sunlight that the metallic green appeared to glow. This was less noticeable in the following days when it was overcast or raining. I did notice that the paint I have would be a bit dark but would be fairly close.
The body is stripped and will be primed and painted white. This time I will make masks out of Tamiya masking tape.
The green has been airbrushed on.
Picture #12: The picture is dark but here is the repainted nose. The green is actually brighter. Two brass rods have been drilled into the wing supports to mount the front wing.

Picture #13: The main body after masking and painting. The airbrushed body has a more even green colour but I think is still a bit dark.
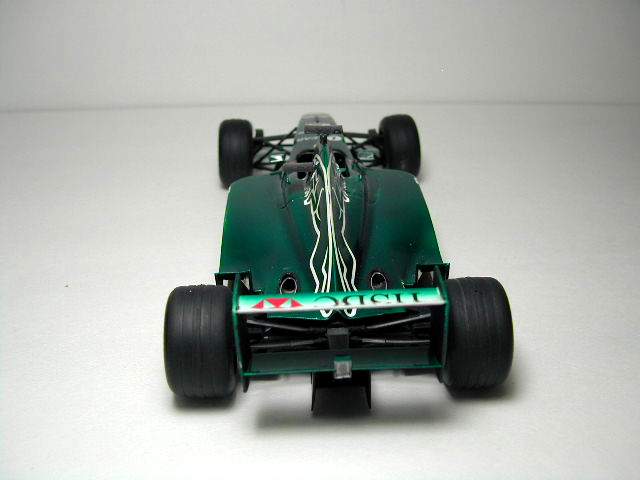
Picture #14: Here are the two exhaust holes cut into the back of the body. I wasn't worried about the rough edges since I will be covering the area with some carbon fiber decals.
Picture #15: Another view of the exhaust holes. You can see the metallic green in this picture.
Picture #16: Overall picture of the body ready for decals
July 3 2000
Picture #17: While watching the French GP I decalled the body. This is one sharp looking car. Too bad it isn't doing better.
Picture #18: Close up of the nose. Picture detail isn't the best. I tried to get a close up of the decals to show their quality.

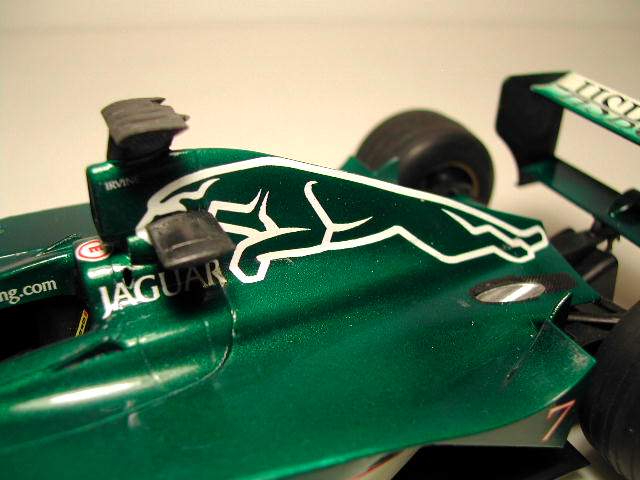
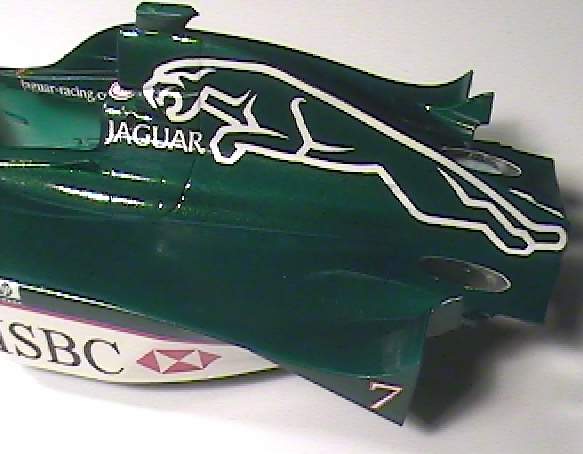
Picture #19: Close up of the "E" and "N" decals as well as the "jaguar-racing.com" and "Pull" decals. Notice also the Jaguar logo that would be behind the drivers helmet.
Picture #20: The CAT logo
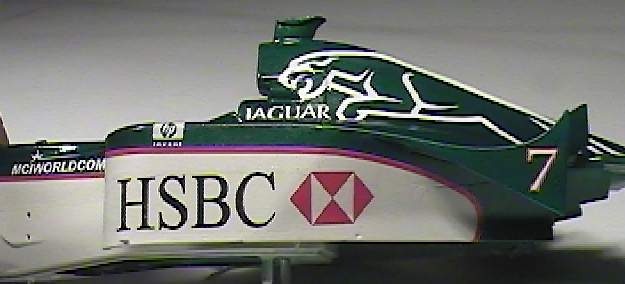
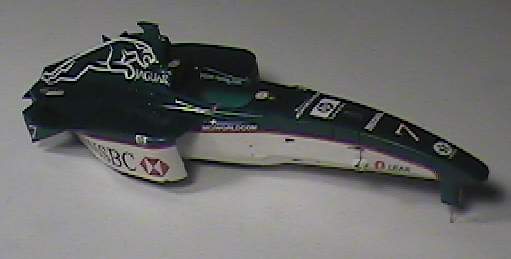
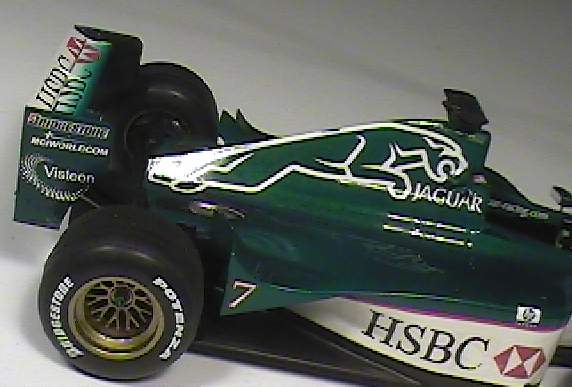
Picture #21: Side view of the car. For some unknown reason the red stripe look pink in the picture
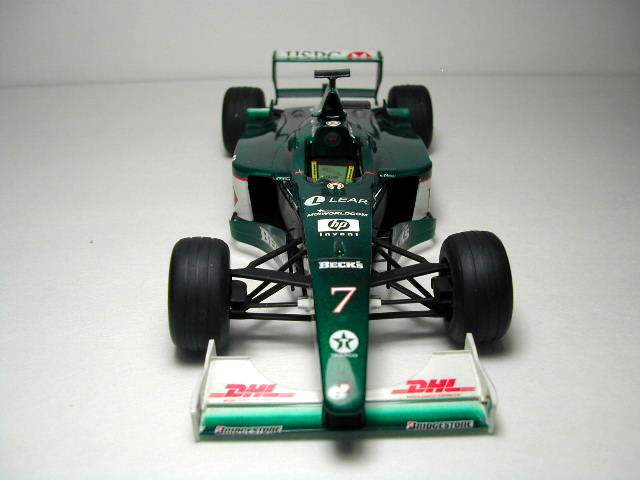
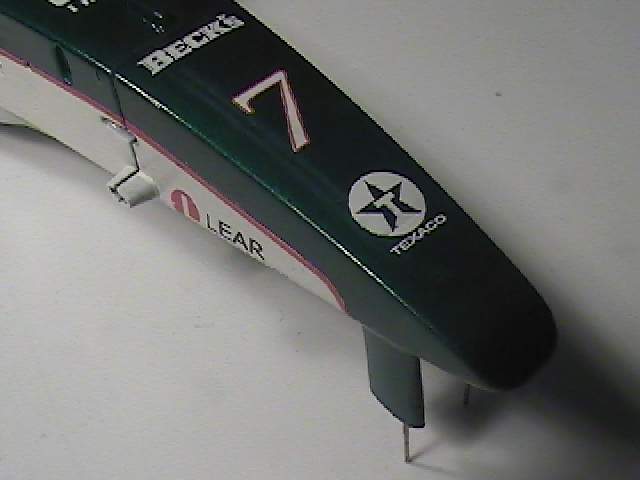
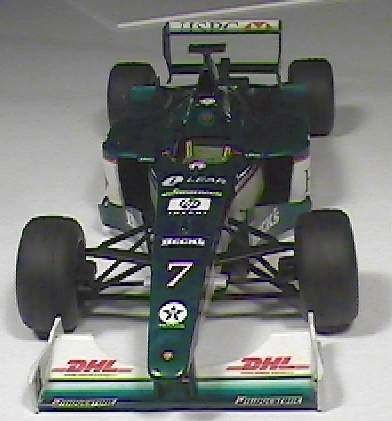
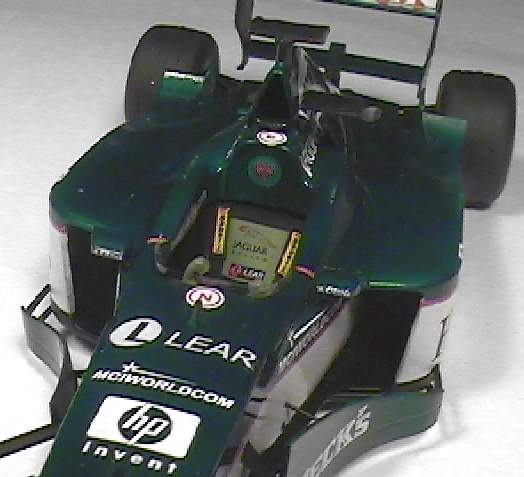
Picture #22: Close up of the front of the car. As I stated before the green is darker than in real life.
Notes: There is supposed to be a resin kit of this car available from Japan. I have not seen the kit yet or have hear about it.
July 17 2000
I have finished decalling the front and rear wing as well as the barge boards. I used the wheels from the Tamiya F310B. The rear tires are a good fit but the fronts will need some work. The MP4/13 tires are wider.
I just noticed that the barge boards on the Jaguar are different from the MP4/13. The front section will have to be cut to make it more accurate.
July 28 2000
Front and rear wings have been painted and decalled. The model has been clear coated and polished out.
After looking through F1 Modelling Vol 6 I noticed a few more differences. The steering wheels provided in the MP4/13 kit do not match what is in the Jaguar. A little modifications will be needed to make it accurate.
The big difference I noticed was that the side intakes are a completely different shape than the pre-season car. Major modifications would be needed to make it accurate.
I used a Modellers PE seatbelts. Normally I prefer the PE hardware and finding my own belt material but I have 4 sets of the Modellers items and I have to use then somewhere. Sabelt logo on the seatbelt hardware is different in different pictures. One had the lettering as white. Another picture had the familiar red letters with yellow background. I used the red and yellow decals supplied in the Modellers set.
No holes were supplier to mount the seatbelt hardware so I had to make them.
Pictures also show different exhaust configurations. The difference is the CF shielding on the bodywork. This also affects the bottom of the Jaguar logo. I constructed mine using pictures of the pre-season car.
So close to being done I can taste it.
Aug 7 2000
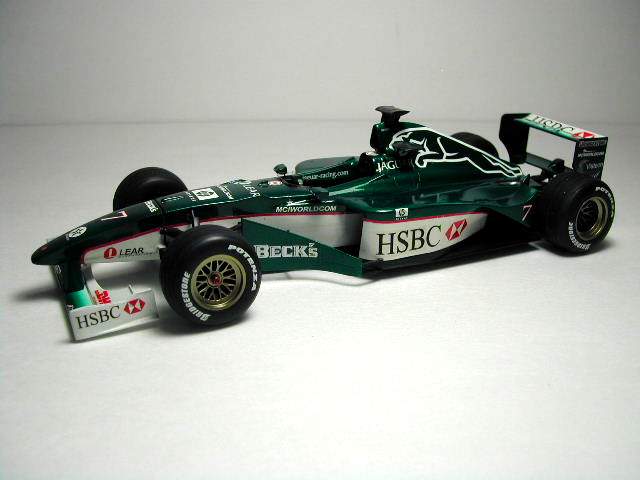
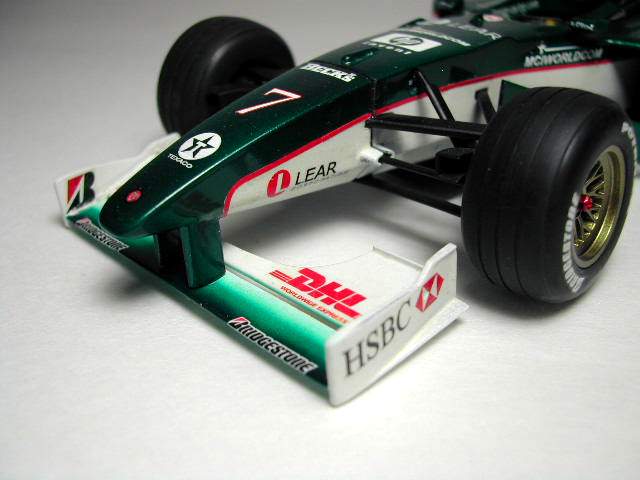
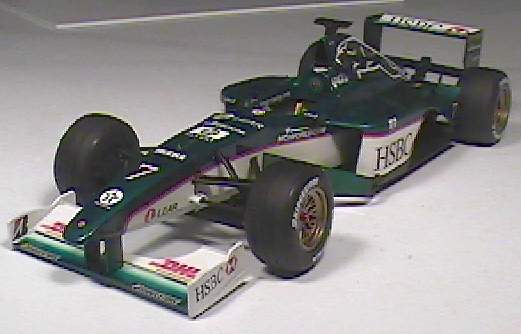
Done. A very nice finish if I must say!
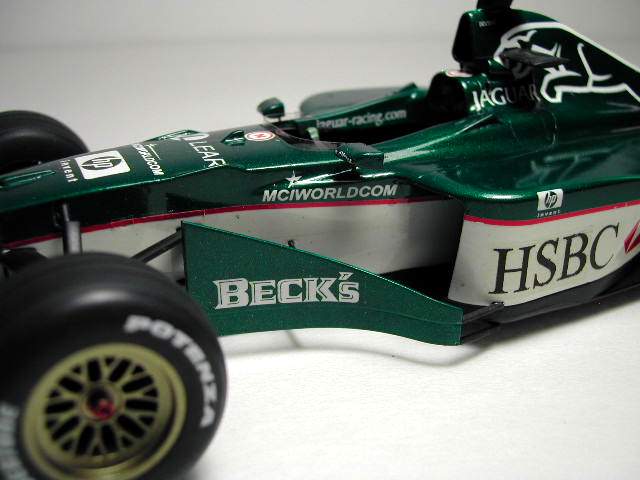
The overall finished car. I found getting the green to white fade on the front and rear wings a bit tough.
One mean machine.
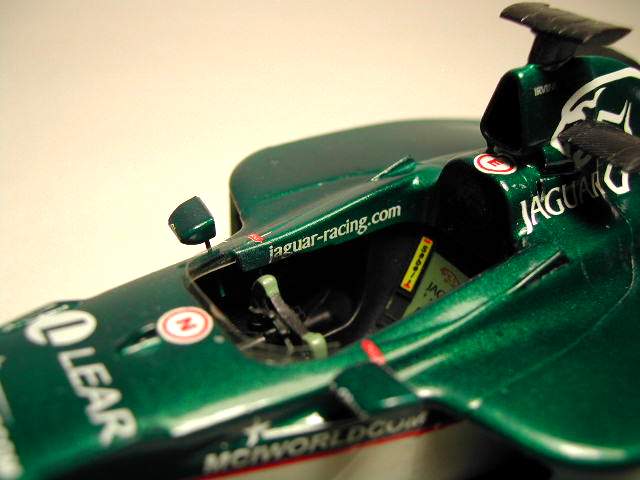
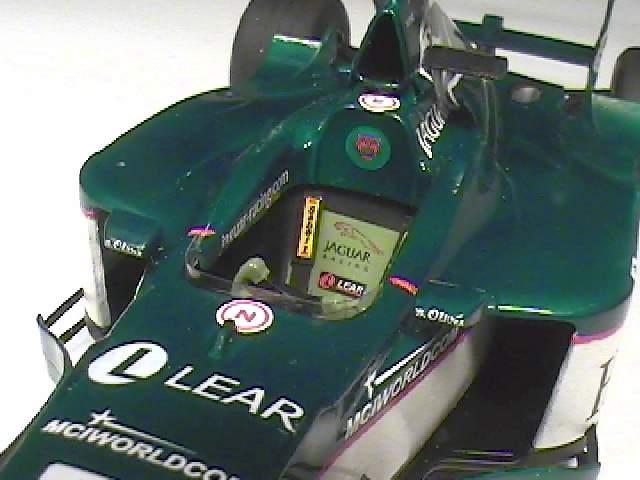
Close up of the cockpit. Notice the jaguar decal and logo on the seat. In later race pictures the head rest is raised while early season ones are relatively flat. Not easy to pick out in this picture but you should be able to read the "S.Oliver" on the mirrors. Seat belt logos have also changed from pre-season to the actual races. The decal is from the Modellers seat belt set. I have seen pictures where only the words "Sabelt" is in yellow. Also in one picture I have seen the drivers name on the seat in the light green area between the Lear and Jaguar logos.
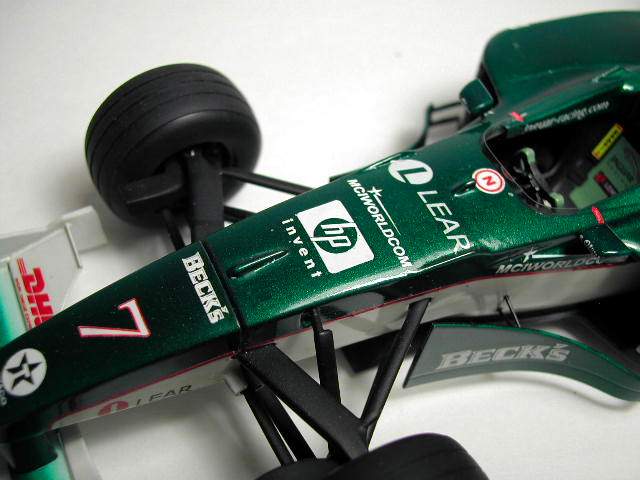
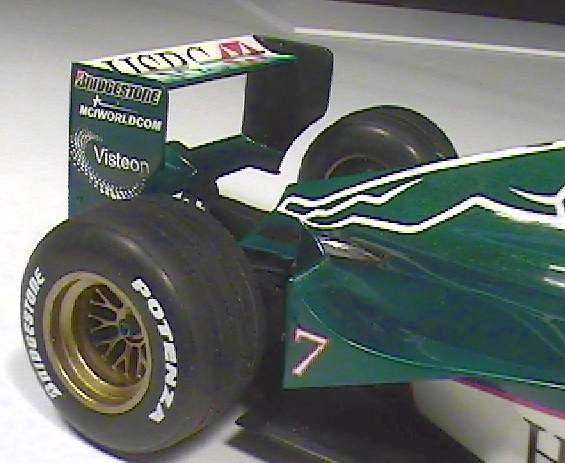
Picture of the CAT and the rear wing. The Bridgestone logo is from the Tamiya MP4/13 kit. New race pictures show that the winglets, where the number '7' is, has been changed.
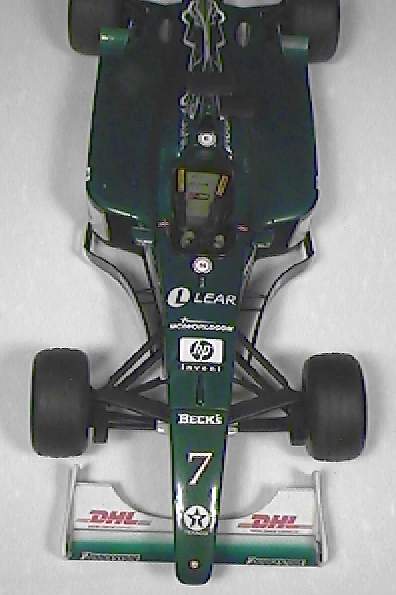
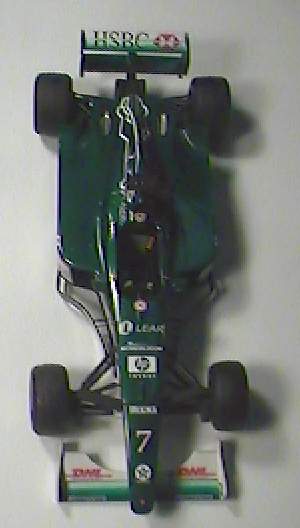
Another closer top view picture.
A closer picture of the rear.
An even closer picture of the cockpit. Not the installation of the second camera
Conclusion
Well it was fun to do and was possible thanks to the ALPS printer. This printer has opened up a whole new world for the average modeller. The internet has also allowed modellers from different countries with similar interests to collaborate on a project such as this.
A MORE ACCURATE JAGUAR R1
With the growing number of references I can now list quite a few changes that would be needed to get a more correct race car.
1. Front wing mounts.
Incorrect in the MP4/13 kit and will have to be scratch built. This also requires the wing to be modified (see Picture #2)
2. Front suspension bodywork
(See Picture #3:) In the MP4/13 the lower front suspension had some bodywork covering it. In the Jaguar the top suspension arm is covered
3. New bump added to nose area
See Picture #4: A new bump will have to be added to the nose
4. MP4/13 nose access panel changed
See Picture #4:. The Jaguar has a different shape and location for the access panel.
5. Winglets
See Picture #5: Check your references as the winglets have changed quite a bit from preseason to race version. Presason changes are easy while later changes require modification to the bodywork that wont be easy.
6. Rollover hoop bump
See Picture #6: I just filed down the MP4/13 bump. To be accurate you will have to scratchbuild a new one. I have seen others sand down the bump and scratchbuild a new one. This is installed after the car is painted to get a cleaner looking assembly.
7. Side pod access panel
See Picture #10: I did not add them to my kit but to be correct you will have to scribe a new one and cover the old one
8. Exhausts
See Picture #14: The preseason exhaust system has changed from the race version. The biggest change is the fact that the covered area goes all the way back to the edge of theh bodywork. I do not know if the rear wing also has some sort of shielding.
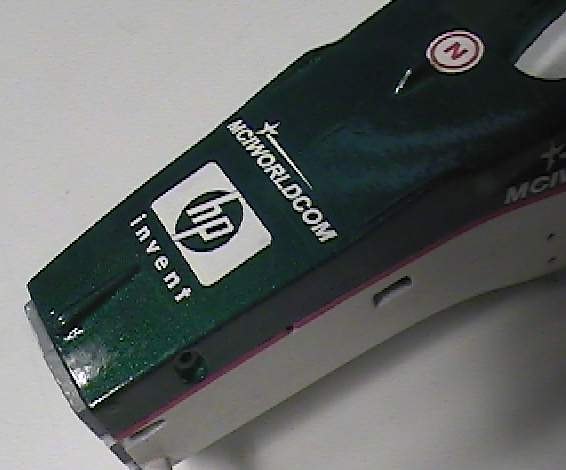
9. Airbox shape location
See Picture #19: If you want to be 100% accurate you will have to change the airbox inlet. The shape is different and it is located higher than in the MP4/13. If you check your references you will see that the emergency shutoff ring is located in this area.
10. Side intakes
Pre-season intakes were relatively similar to the MP4/13. A bit of carving and presto Jaguar R1. However race pictures show a very different intake. Quite a bit of sculpting and puttying will be needed to make this accurate
11. Steering wheel
The kit steering wheels are incorrect and you will have to do some scratch building to get a correct wheel
12. Headrest
It appears that the race headrest is raised from the bodywork. The pre-season was relatively flat.
13. Seat
Pictures I had showed the preseason seat had a Jaguar and Lear logo. These logos were on a green strip on the seat while the rest of the seat was black. Newer pictures show the seat to be all green and that the drivers name is present between the Lear and Jaguar logo.
Seatbelt logos in pre-season were the "sabelt" in black with the yellow background. New pictures show only the "sabelt" words in yellow.
14. Aero Bumps
The two aero bumps (see Picture #6) on both sides of the tub almost run the entire length of the tub.
15. Second Camera
On the MP4/13 there are two camera mounts. To make this project quicker I have installed both camera. To be correct you will have to fill in the mounting area for the side camera
16. Barge boards
The MP4/13 are incorrect. The Jaguar Barge boards never go through the front suspension arms. They also have a 3D structure to them. For my kit I just cut the MP4/13 boards short of the front suspension arms. To be correct you will have to scratch build new ones. There is no way to modify the kit ones
17. Front tires have an extra groove for the year 2000.
To be correct you will have to turn new ones.
18. Wheels are incorrect
Steal the wheels from the Tamiya 1:20 Ferrari 310B kit. I did have some problems with the front wheels being slightly narrow.
19. Rear body separation lines incorrect
New ones will have to be scribed into the body and the old ones filled in. I was lazy and did not change the MP4/13 panel lines
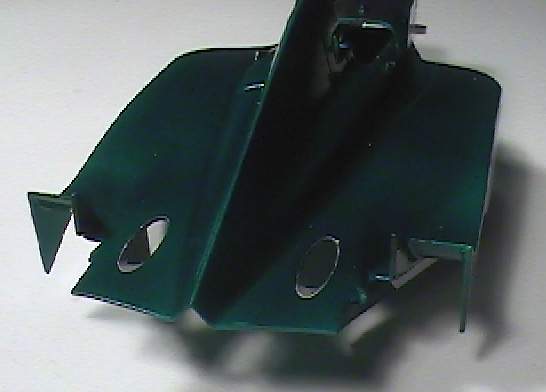
20. Front wind endplates incorrect.
The front wing endplates have this deep 'V' cut in them. I did not notice these until after the body parts were painted. The kit parts are incorrect shape wise as the rear part of the endplates have the incorrect shape. It should be relatively easy to modify the kit part using styrene rod.
21. Rear wing incorrect
The number of wing elements are different and the wing end plates are different from the MP4/13. The entire rear wing will almost have to be scratch built.
These are the changes I have noticed. I am sure there are more but my project is finished.
Photos added dec 26 2010
| Jaguar R1 | |||||||||
| |||||||||