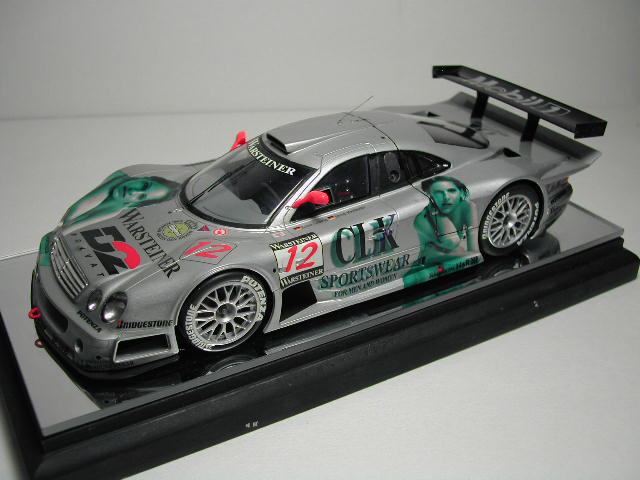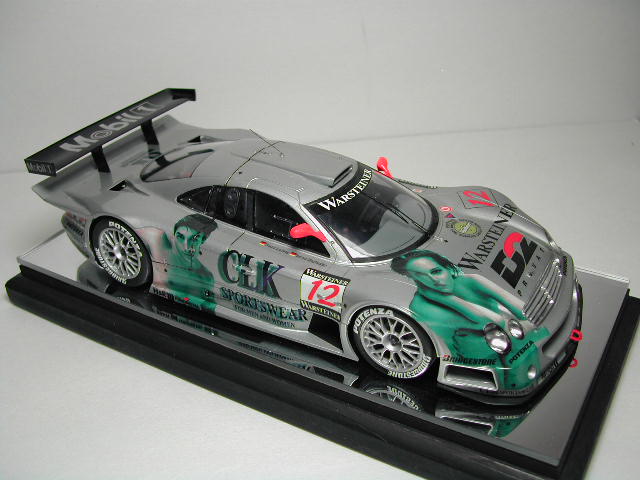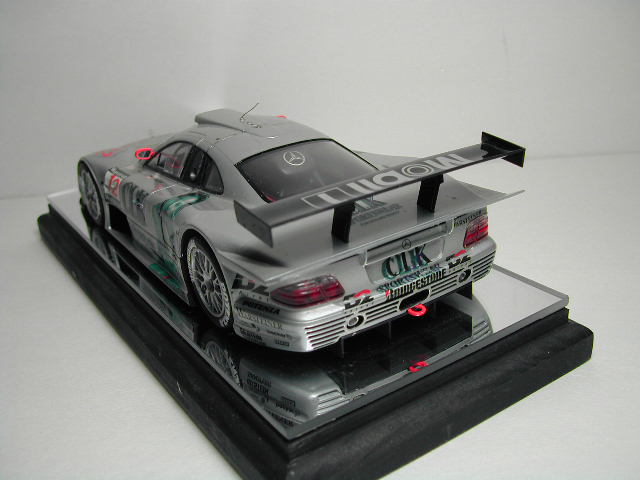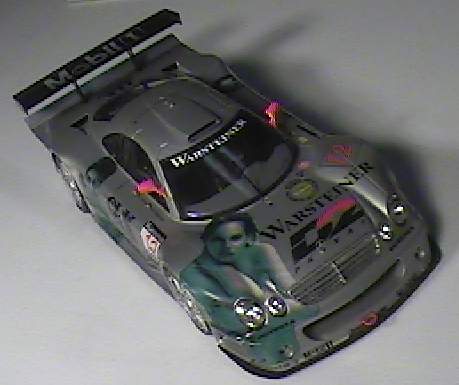
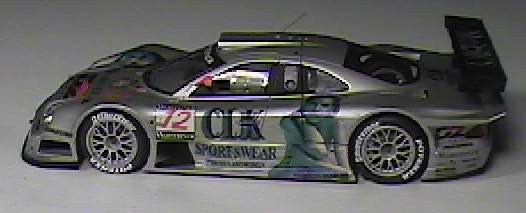
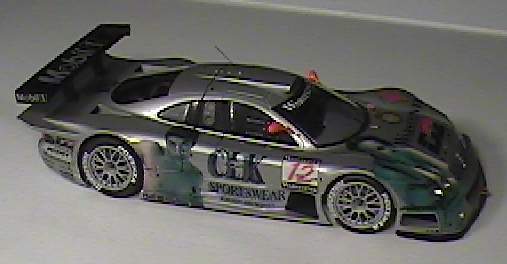
Tamiya 1:24 Mercedes CLK - Sportswear
This model was built basically out of the box. The deviations from instructions will be listed below.
Comments:
Glue: Testors tube glue and white glue for the clear parts
Body: Testors Metalizers Buffing Aluminum with Testors Metalizer sealer.
Chassis, Engine: painted with Tamiya acrylics and Testors Metalizers
Decals: Well thought out by Tamiya and very good fit.
Good Points
Fit of parts is excellent
Decal fit is excellent
Bad points:
I used Solvaset and ruined 3 minor decals. Be careful with the decal solution you use.
The moulded hoses in the kit are labour intensive to clean up.
Additions:
I added bare metal foil to the firewall and floor. The instructions call for a silver paint but I knew this would look cheesy so I added the bare metal foil. There is also a hose that was corrugated. Instead of trying to sand the seam line that ran down the entire length I opted to wrap some wire around this before painting. This did create a slight fit problem later but does look better.
Other:
I was experimenting with painting the exhaust pipes and they turned out looking good. The base colour is Testors Metalizer non-buffing aluminum. I then used Tamiya clear blue and red at various points of the pipes. The blues were airbrushed where the pipes bent. The red was used at locations closer to the engine. I also used Metalizer Exhaust and Burnt Iron in a couple of locations and near the muffler.
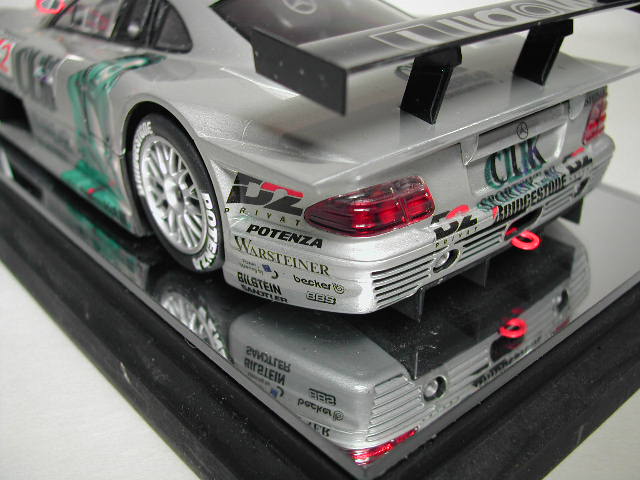
The fit of the body panels was excellent. Every thing snaps into place and I can probably leave it as is instead of gluing the body on. This way I can disassembly the model if needed.
Decals
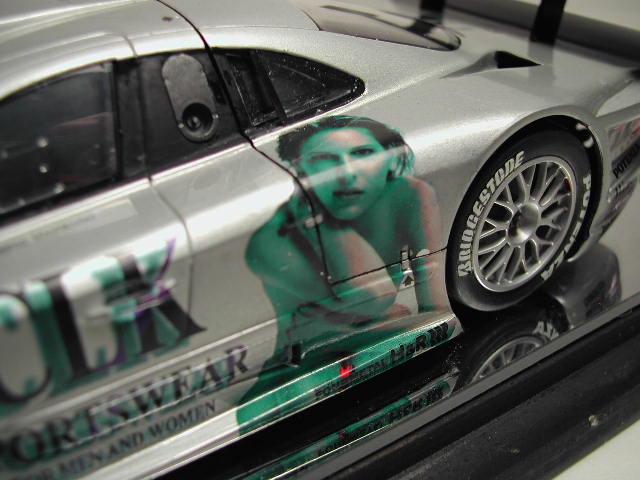
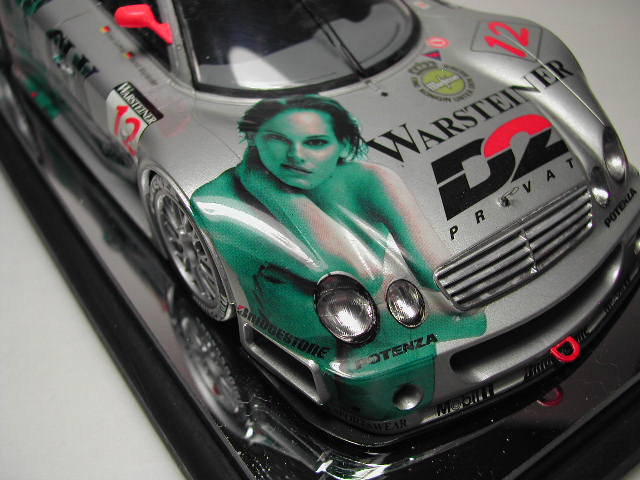
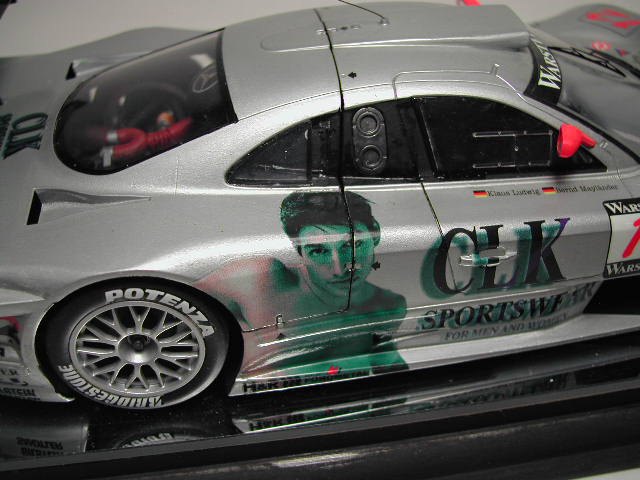
Some of the figure decals will need the edges trimmed before applying. Most of the rest do not need to be trimmed. The decals that come to the edge of the engine cover will need those edges trimmed, as do the ones that go over the headlights. There are also various cutouts for lights and tabs that will have to be cut out before applying. The decals that go over the door handles will need to be slit to get them to sit in the door handle recess.
I taped the body together when I was adding decals that crossed over the two body panels to make sure they lined up. I did have one decal rip slightly when I took the body panels apart. There was a slight overlap to the other body panel. I should have taken an exacto blade through the panel separation lines to be sure all decals were separated.
Tamiya even includes the decals for the door handles and various scoops that one decal cannot do.
Looking at the box art I put aside a weekend for this decal job. This took a lot less time than I thought. I did the entire car in approximately 4 hours.
The decals needed a setting solution. I only had Solvaset and this was too aggressive for this application. I ruined 3 small decals using this setting solution.
The only decals I had problem with were the background squares for the numbers. These would not fold over the edge without creating a crease. In the end this crease is barely noticeable but I can see it.
Watch the placement of the decals on the rear bumper. I misplaced the big decal, which affected the placement of the rest.
For some reason I had trouble putting the decals on the tires. Normally these are relatively simple to do but my brain must have been off since I did ruin 3 small decals and misaligned most of the tire decals.
Conclusion
Although I have seen this model in magazines the results didn't really do much for me. Having built the model and seeing the model in front of me changes my mine. This is one very sharp looking car and the quality of the decals help a lot. I had such a fun time building this model I am considering building another one super detailed.
I have to say that this is very rare for me. If I have built a model before I will never build a second one later on.
If you are ever in a model doldrums, whip out this model and build it out of the box. If this model doesn't get your juices flowing then sell your collection
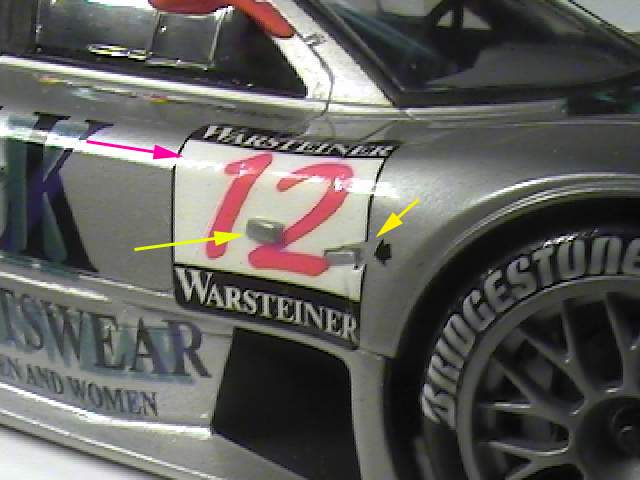
The yellow arrows show where I had to cut the decals before applying them. The pink arrow shows where I had a problem with the white decal not wanting to lay flat.
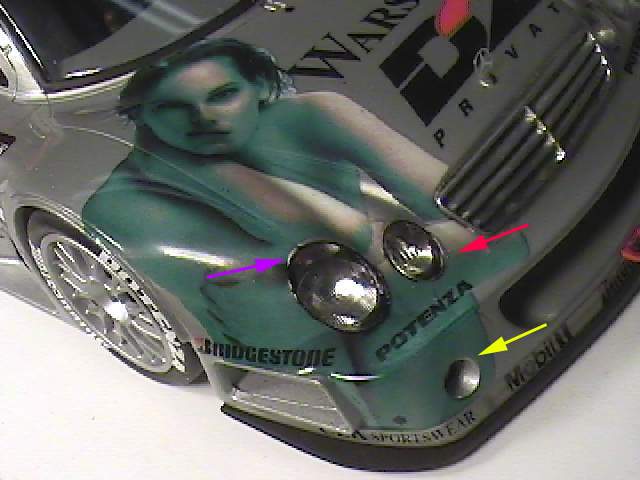
I am not sure if this is supposed to be like this but there is a slight recess when I installed this part on both sides. If I moved it forward I will have to fill a gap at the back part of this part. Check references to make sure what is right. Box art is inconclusive.
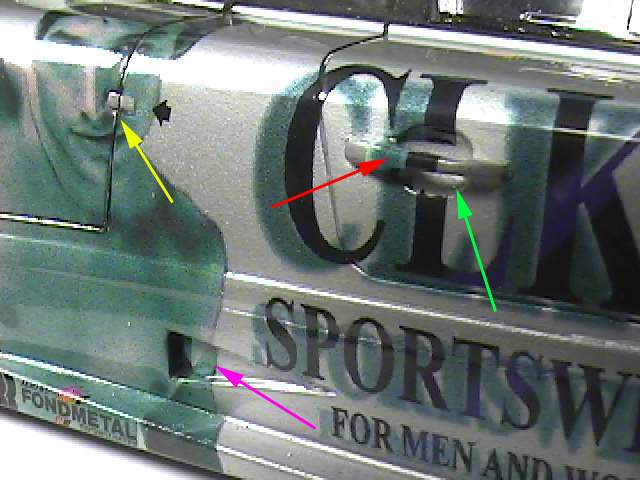
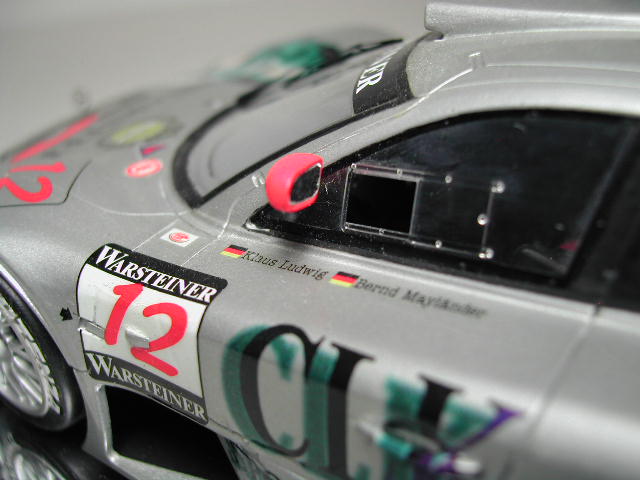
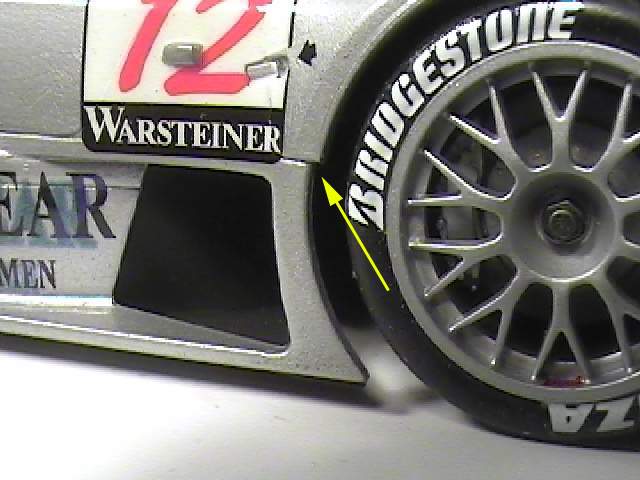
The yellow arrow shows where I cut the decal before applying. The green arrow shows where I had problems with the decal that was supposed to go behind the door knob. I slit the decal before wetting the decal to allow it to go behind. Unfortunately with the setting solution I was using it softened it too much and the decal ripped. The red arrow is the extra decal supplied by Tamiya for the door handle. The purple arrow is the extra decal supplied for inside the NACA scoop.
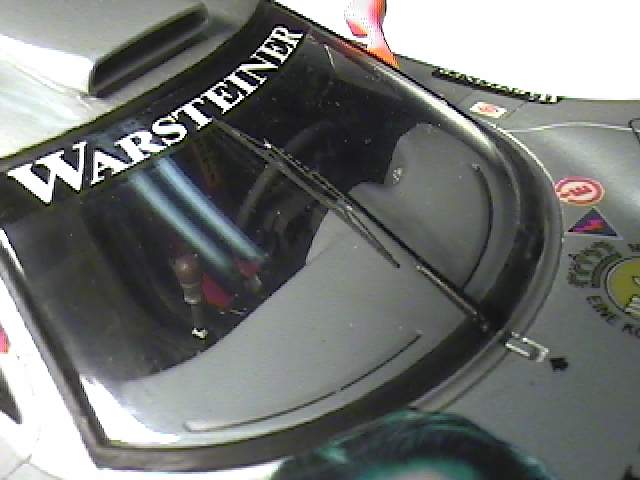
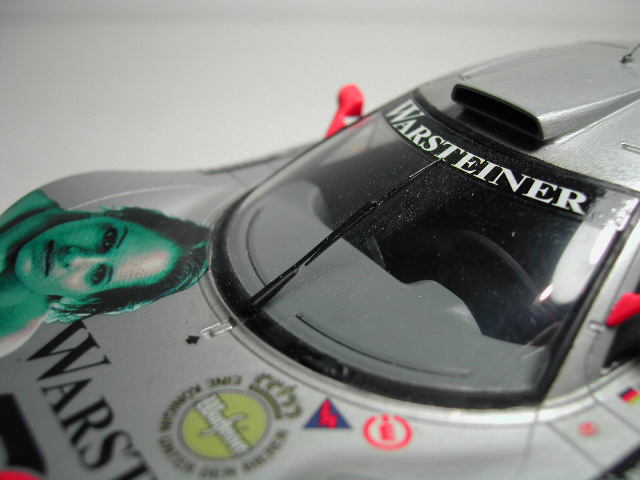
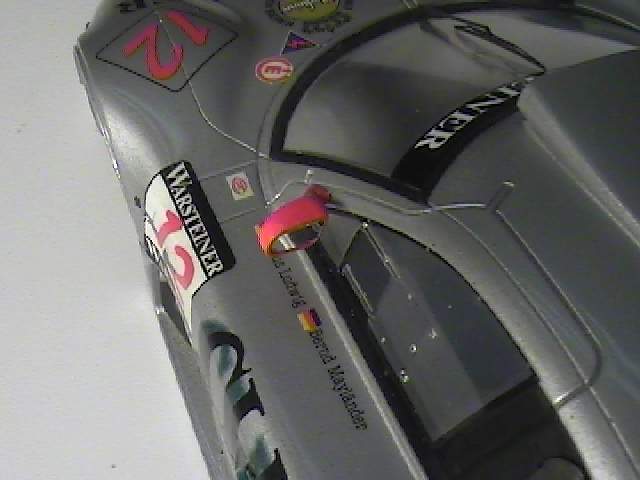
A bit hard to see but this is a Modellers aftermarket windshield wiper. Very nice looking.
The three arrows showed where I had problems with the alignment of the decal to the hood. Gaps are evident. At the time I was more concerned with not ruining the decal instead of the alignment.
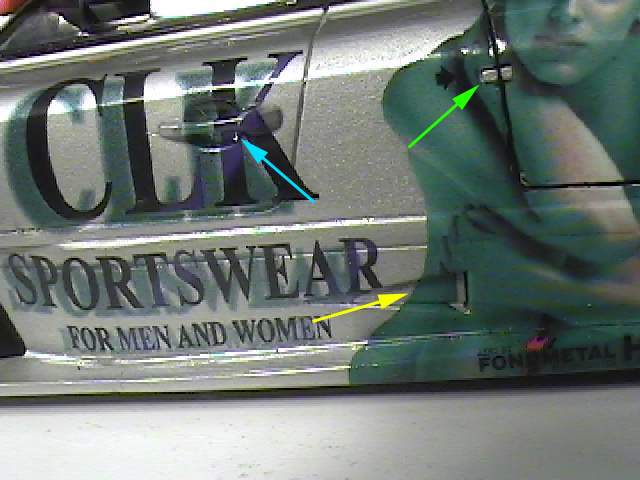
The green arrow shows where I precut the decal before applying. The yellow decal is the extra decal supplied for inside the NACA duct. This decal is slightly out but this was dependant on where the larger decal was applied.
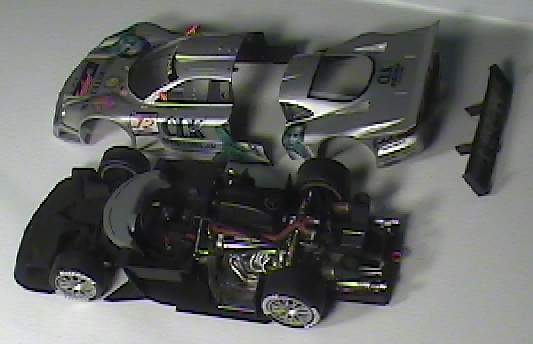
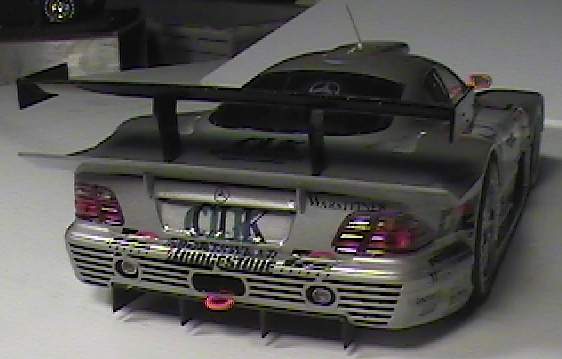
I don't need no stinkin' glue. The body panels and rear wing fit on so good that I decided not to glue the body or rear wing on.
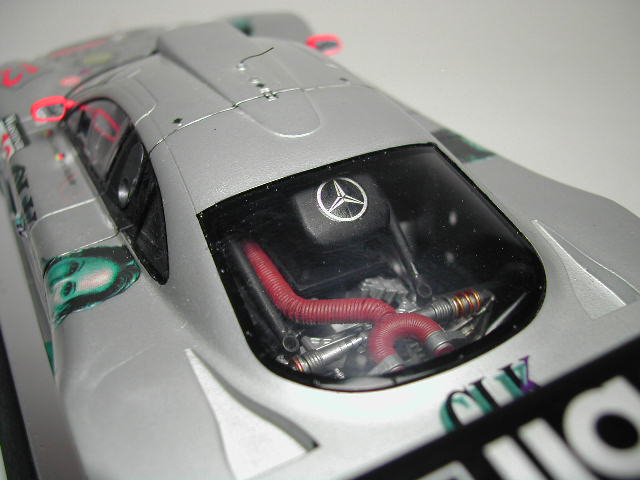
Kit rear windows replaced with Aluminum sheet.
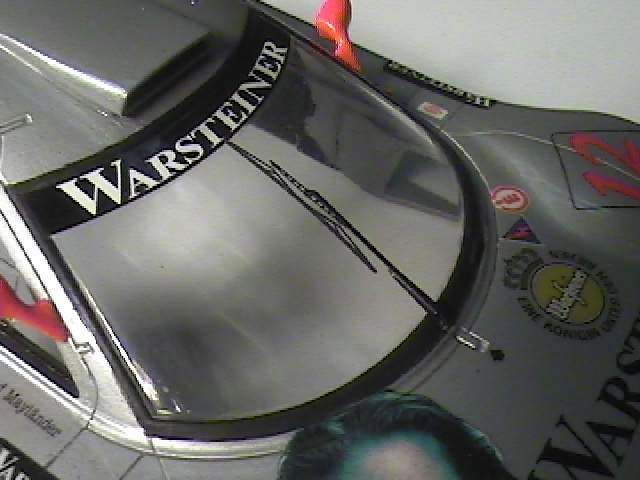
Another view of the aftermarket wiper.
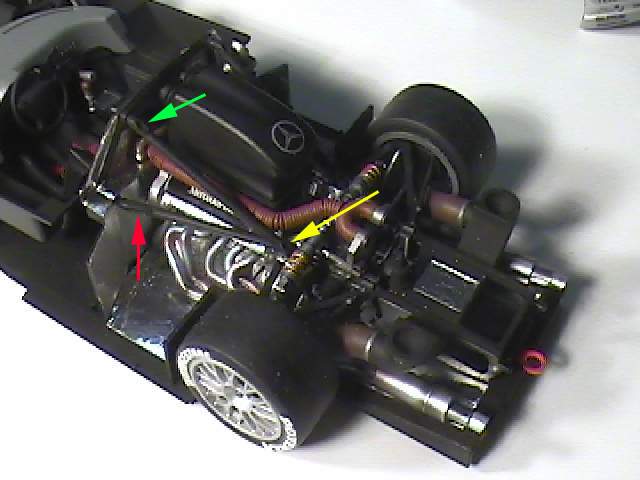
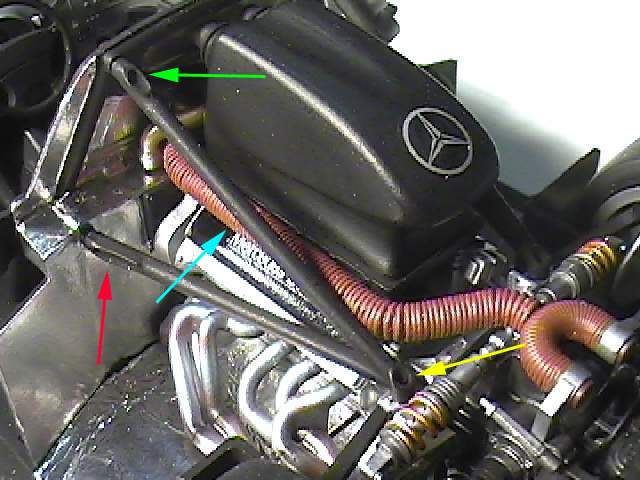
The two pictures above show modifications made to the engine braces. The yellow and green arrows show where I drilled out the kit part to represent tubing. The red arrow is the recess included in the kit. The light blue arrow is the kit hose with wire wrapped around it. This reated a fit problem but was easier to add than to try and clean up the seam line.
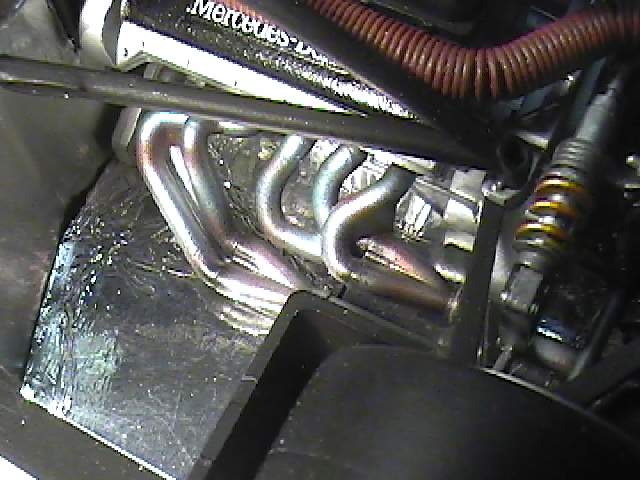
Not as impressive in the picture but I like the finish of the exhaust headers.
The yellow arrows show where I used a 0.5mm marker to add a black line into the recess.
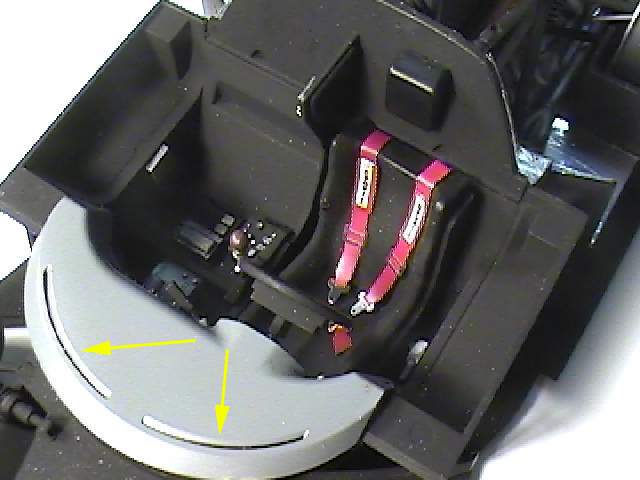
Aftermarket Modellers seatbelt set added to the kit. All other details picked out in various colours that I had with me at the time so they are not 100% accurate.
More photos added Dec 26 2010
| CLK | ||||||||||
| ||||||||||