Provence Moulage 1:43 Ferrari 512LM
This is a special anniversary PM kit. I like these little gems as they can look quite nice. This is one of PMs more recent kits so I thought I would give it a try. I am hoping that the modern kit would have better engineered parts and would fit easier.
The kit fit very well in some area and was a nightmare in other areas. The end results are very impressive.
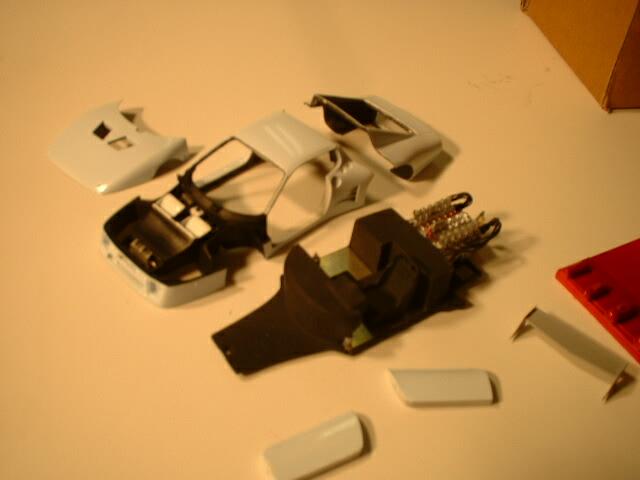
Here is the build process half way through. The instructions are a bit vague in some areas. The body colour as not clear but I finally figured out that it is to be painted a light blue. Some minor wiring was added to the engine area. The body panels fit very well for the multipart body.
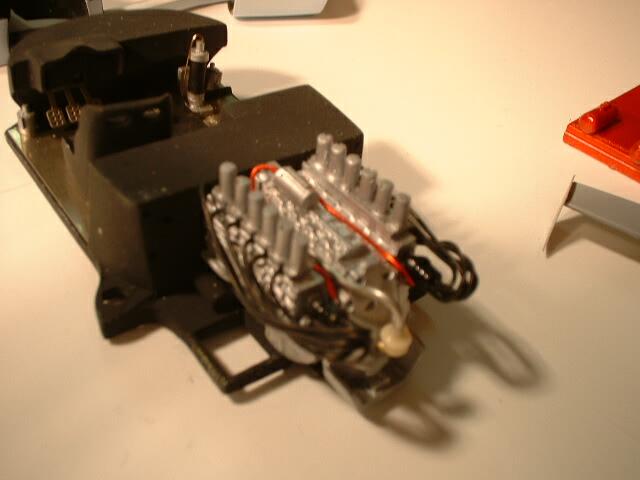
Here is the engine with a bit of wiring. Unfortunately the wiring I used was a bit thick and that caused problems later on when I was adding the rear frame and air ducts. I can not add the frame here as parts of it are attached to the body. It sure would have been easier to attach them now. As it is I have to finish up the body before assembling to the chassis. This means finishing the interior and then the body., decals and clearcoat before I can finish the engine area.
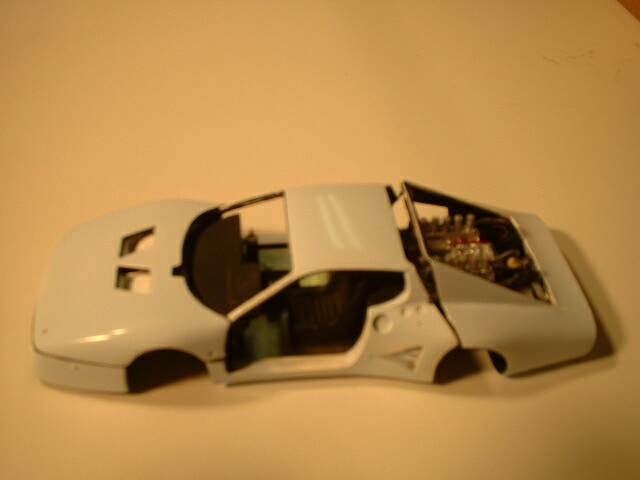
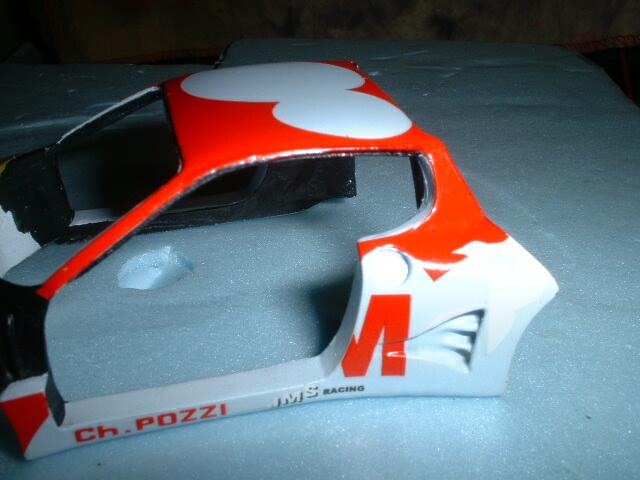
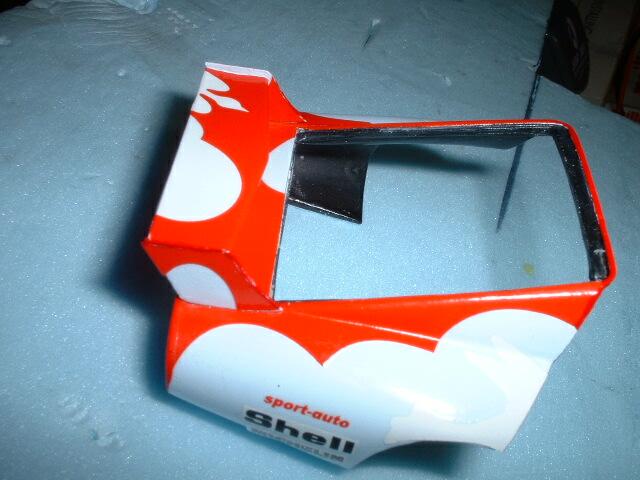
Here are the body panels installed. The hood is a nice fit. The rear end is also a good fit but nothing holds it in position here. The doors are not a major concern since they will be open. Interesting seeing a non-red Ferrari.
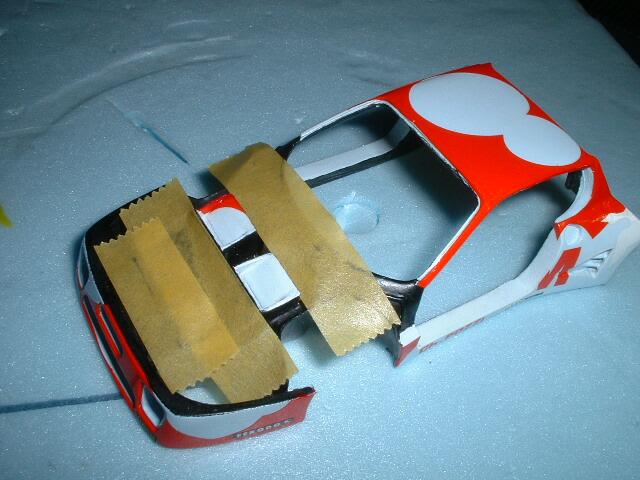
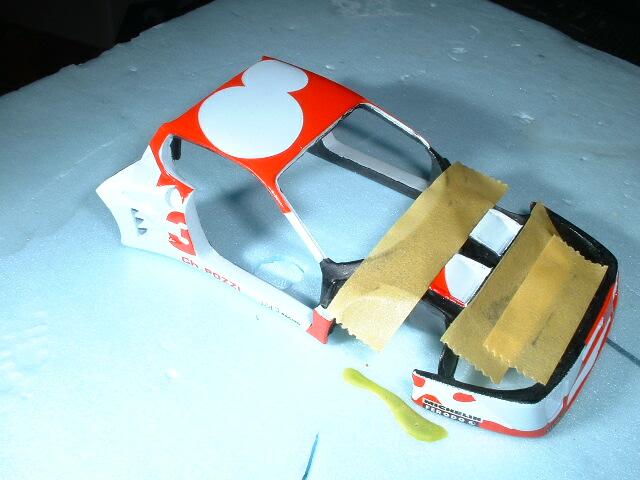
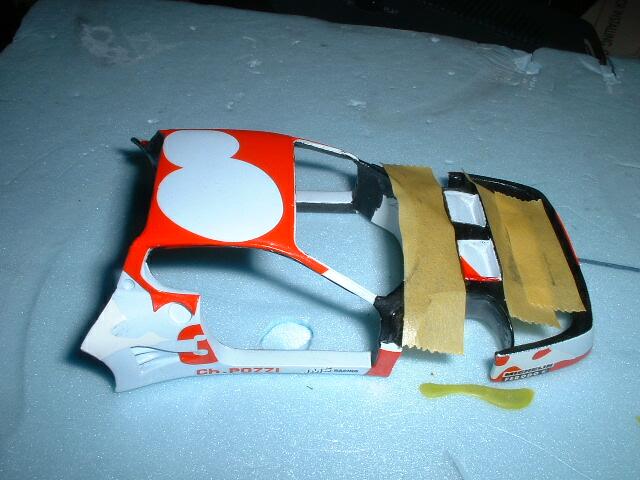
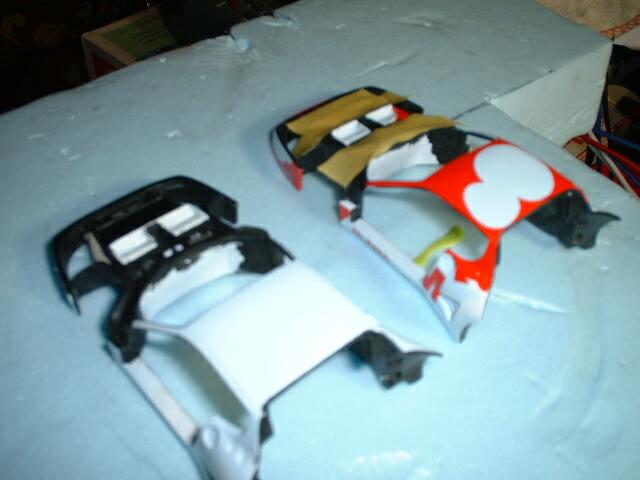
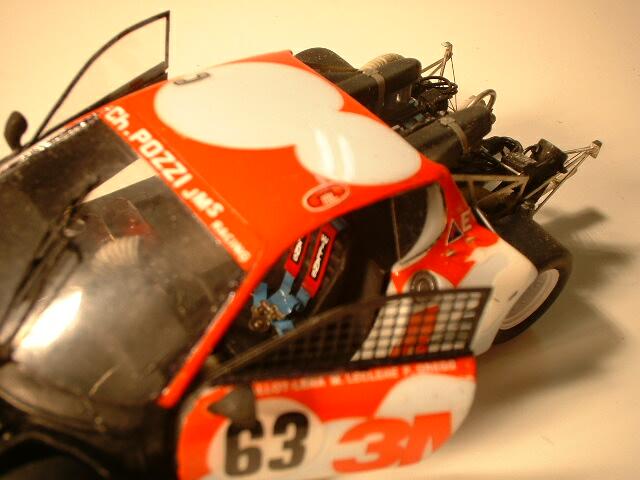
4- here are the main decals added. I still have to add quite a few sponsors logos. Since I had to clear coat the decals I am masking off the areas that are semi-gloss black so I do not have to repaint the whole thing. As it was I had to do a bit of touch up.
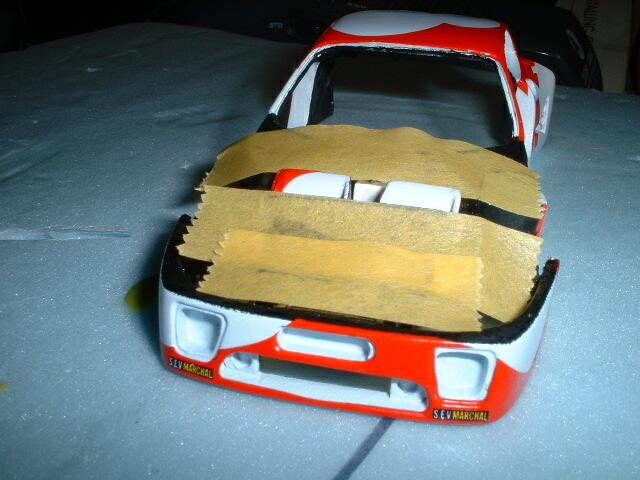
Another view of body ready to be clear coated. The front headlight and grill areas will have to be painted black before the grills can be added
6- the side view
7- 3/4 view
8- another side view
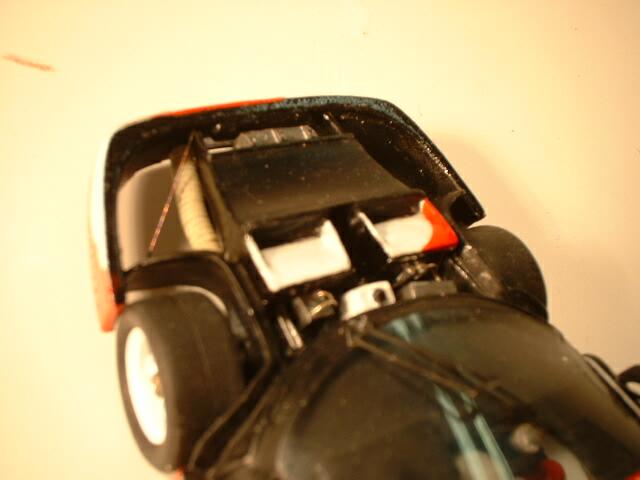
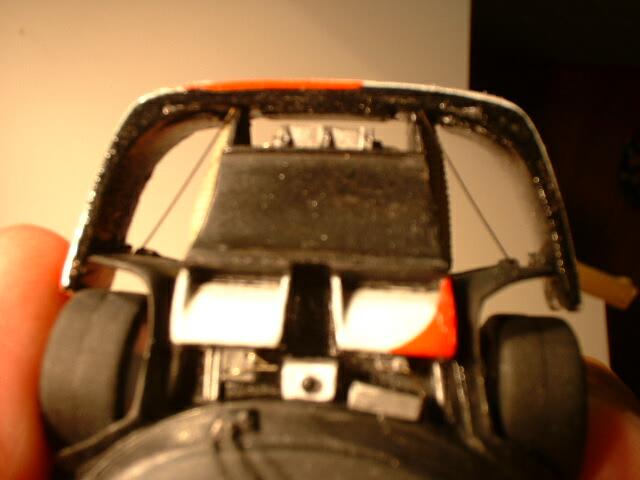
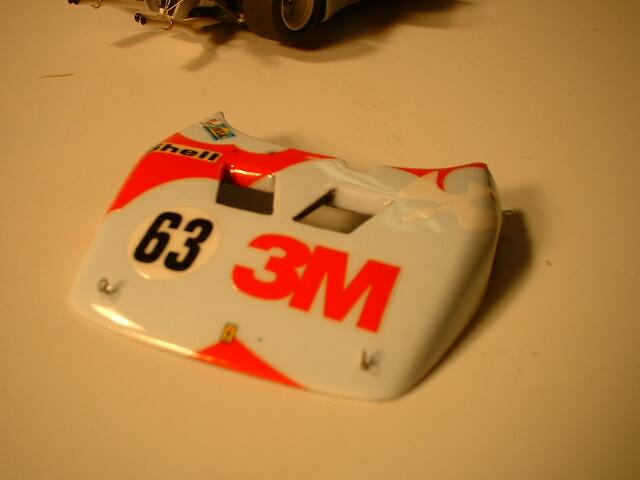
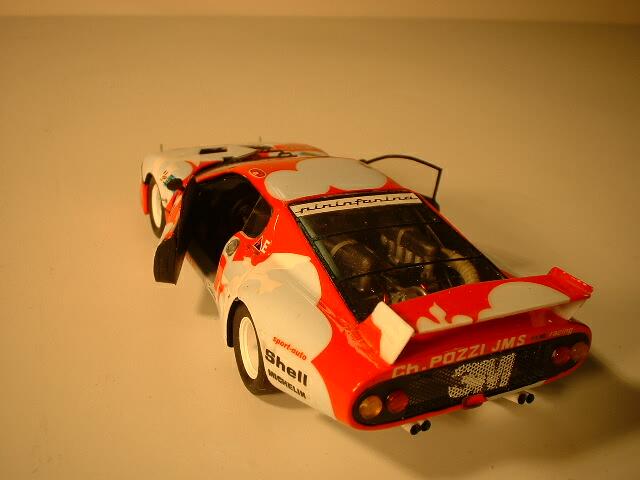
9- rear deck. The decals were a bit hard and required a soaking of Solvaset before they got soft enough to lay down over hard corners and bumps. Fit of decals were very nice. The top of the rear deck was hand painted with a Tamiya red as this was not supplied in the kit. The rear wing endplates also needed the edges painted red.
Overall I can not think of any decal that was a major problem. The again I like doing decals. The placement of the sponsors decal on the side of the rear deck is not shown in the instructions. None of the photos showed their placement. I put them on parallel to the rear deck line but I think I should have put them on parallel to the ground. I did not notice this until after everything was assembled.
The rear wing was too wide and did not fit into the slots provided on the rear deck. With everything painted all I could do was to glue it down.
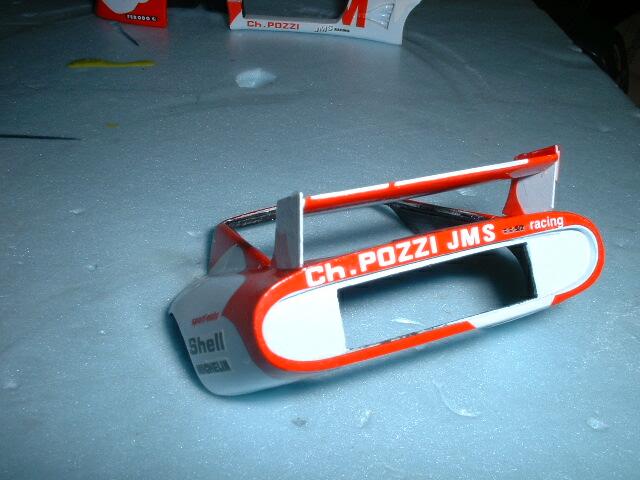
10- The rear of the rear deck. All the red and logos are decals. The decal was slightly off but nothing major. Playing around with the Solvaset and the results look good. The back area will have a grill so the inside are will be painted flat black
Here is the hood all ready to go. No surprises here are all surfaces for the decals are flat.
Doors- There are a few decals on top of decals and the white portions could have been a bit more opaque. On the roundels you can see the red underneath.
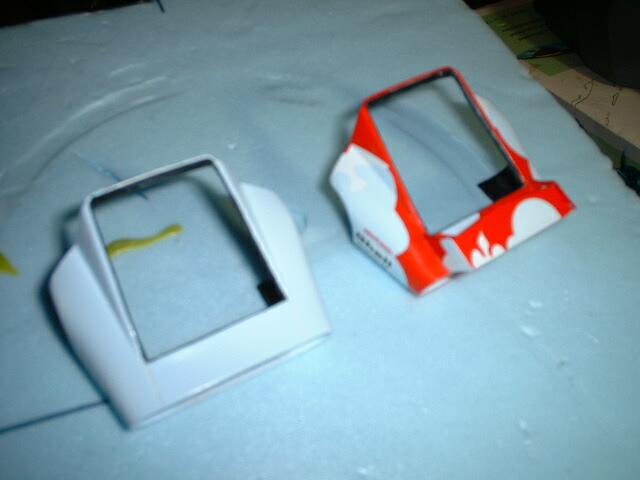
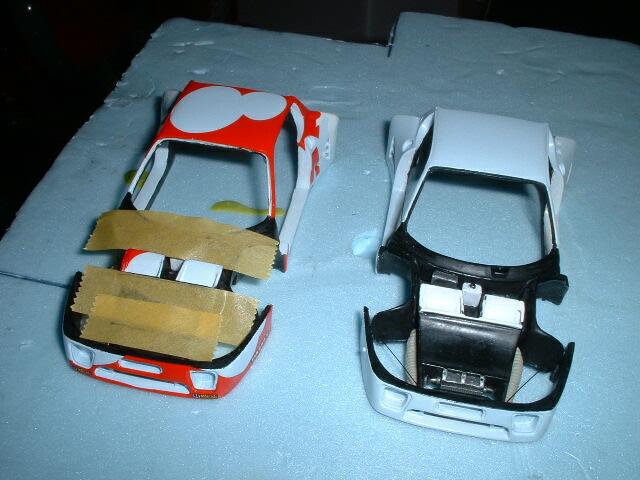
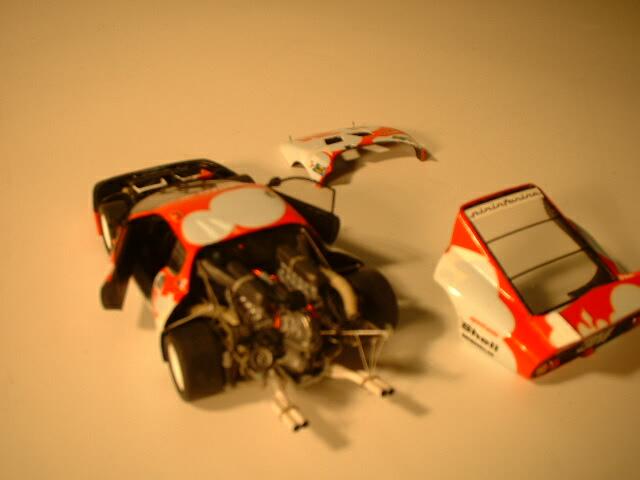
Huh? Yes I am working on 2 of the same model at the same time. For certain models I have done that as it is not much more work to build the second model. This then gives me a model that I can give away as a gift.
17- Those small little engine braces are neat little things. They add a nice touch to the front area.

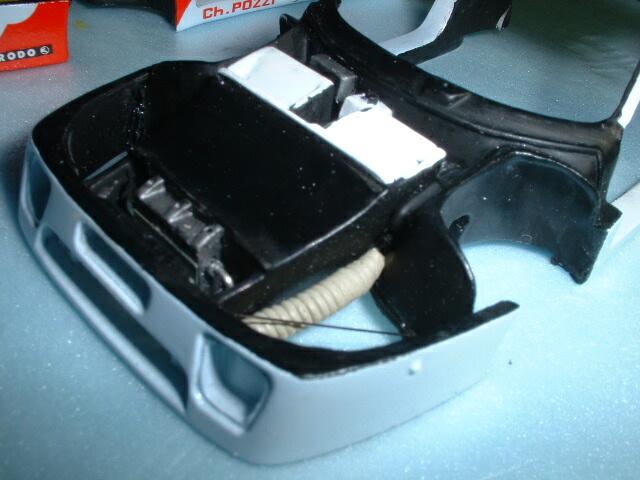
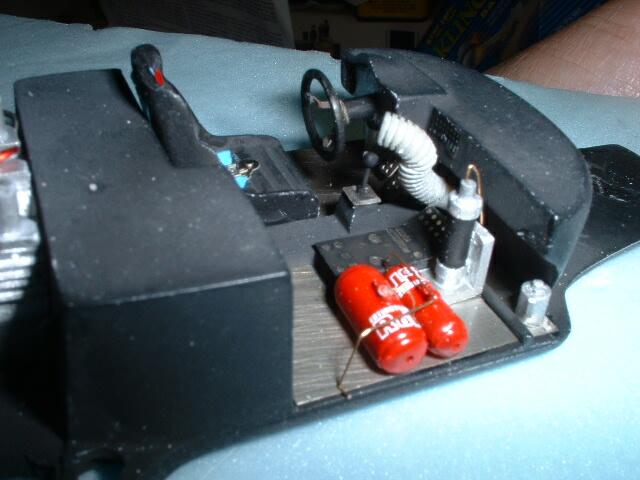
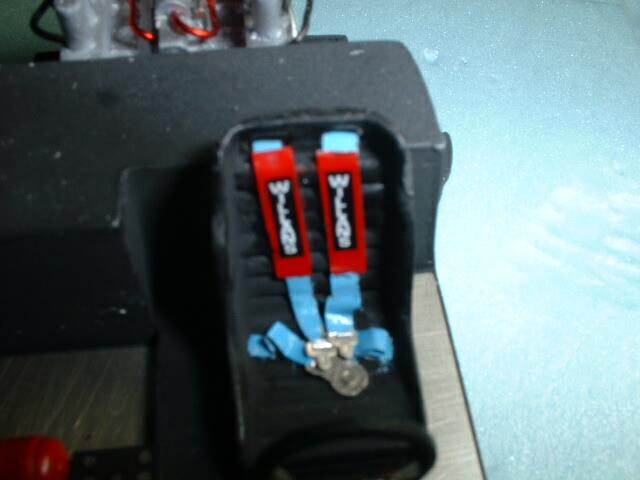
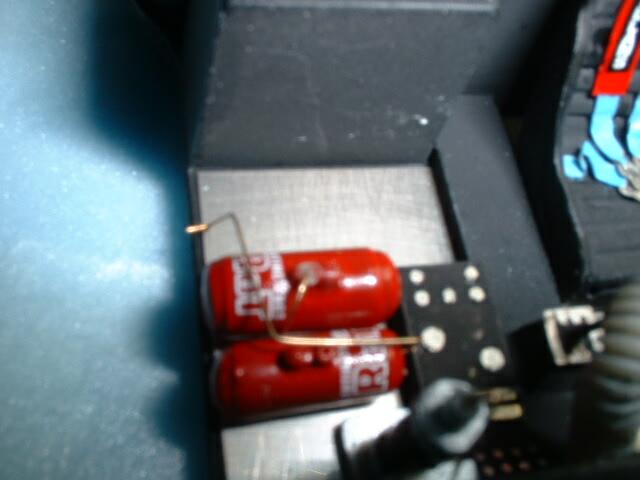
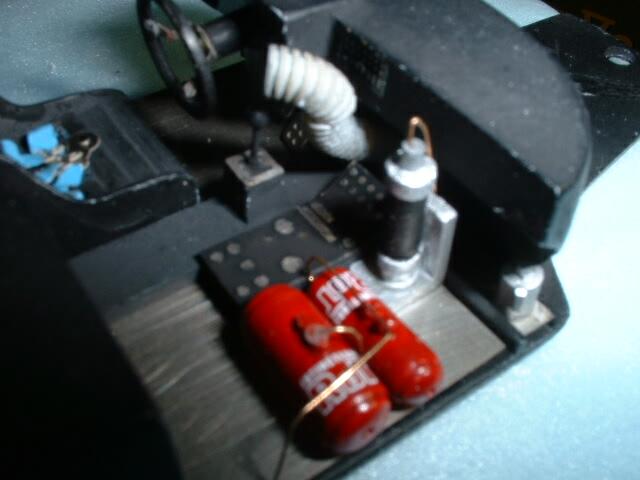
Here is the cockpit basically done. The seat belt material is lead foil. The hardware is provided in the kit. The vent hose and extinguisher bottle are also provided. Plumbing of the bottle is not very clear in the instructions. The floor of the chassis are a few PE pieces supplied and it very well. The steering wheel center is also a PE item that is not clear how they are installed.
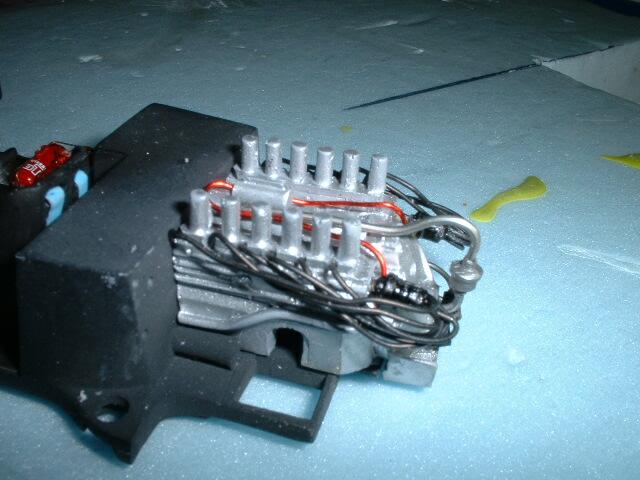
20- well lets go back to the engine again for another look. It looks a bit bare hey it will get very busy quickly
21- and then back to the cockpit. Here you can see the PE foot pedals. The plumbing on the bottles. Decals were provided for the bottles. Instrument panel is a one piece decal. Angle of steering wheel not very clear but if you look at it sideways it looks too low.
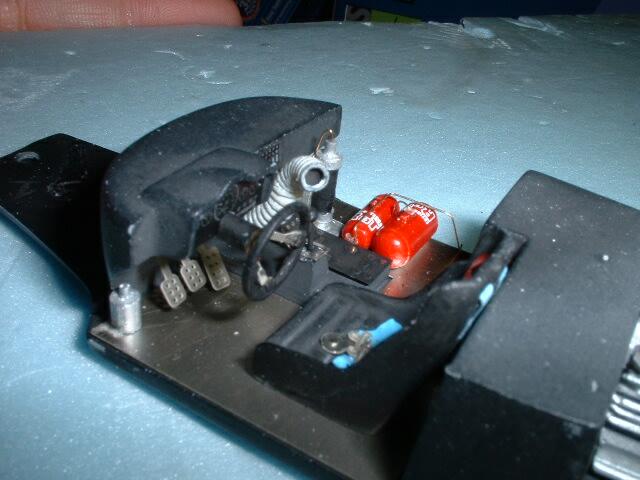
22 - Reverse angle. The shift gate is a PE part. The shifter is resin

23 - and back to the engine area for the reverse angle. On the second kit I replaced the black wiring with something a lot thinner.
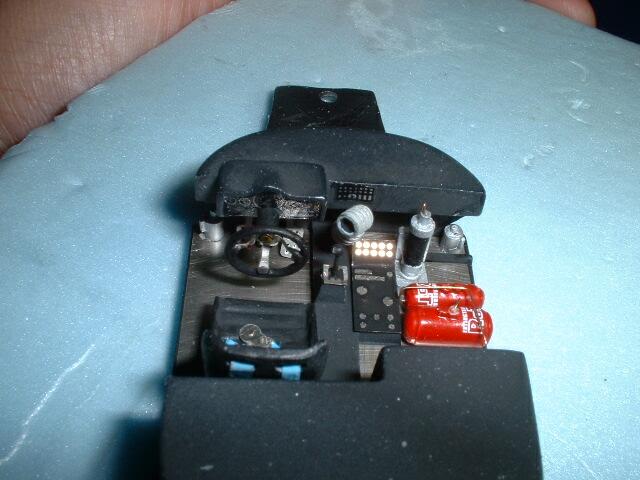
24- So lets jump again back to the cockpit. The middle console is a PE part painted flat black and then the buttons scraped away to reveal the shiny stuff. I thought about painting a few buttons different colours but did not have any references.
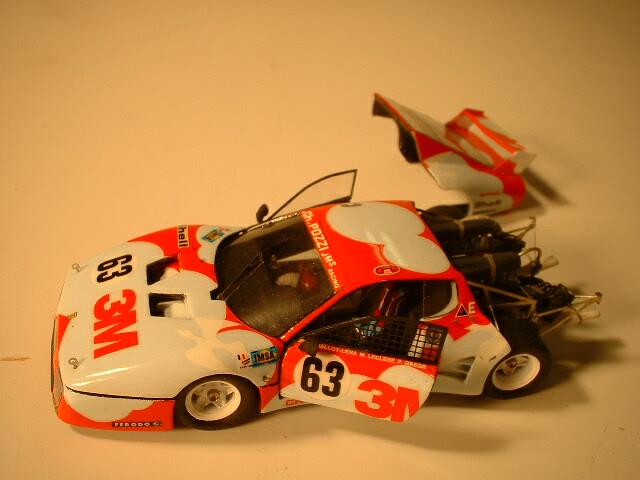
Well here is the model finished. A bit fuzzy but the overall feel of the model is there
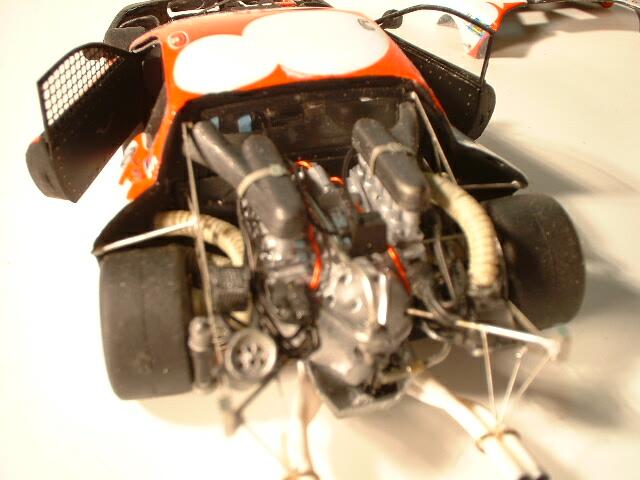
A better shot of the engine. Yes there is a lot of stuff in there. I thought the logic build sequence is to install the PE engine frame and then add all the little bits. Trying to maneuver the vent ducts through the frame got to be a nightmare. Not fun I can tell you. I don't know if it would be easier to add the ducts and then the frame. However you risk the frame not fitting at all. The ducts were not a perfect fit but they looked OK. Make sure you have tiny tweezers as there are a lot of parts that need them to be installed.

I screwed up the PE piece for the exhaust braces. Actually they didn't fit. One side was too short. I replaced the PE part with fine wire and tiny amounts of CA glue.

Another view. Well with all the parts being moved around it turns out that part of that PE frame is what holds up the rear of the bodywork. Through some shear good luck my rear deck matches up very well with the main body.
Windshield installed - the kit supplies 2 but one was good enough. I started with tiny scissors and cut as close as I could. I then went in with sanding sticks with rough grit to sand it down to the final desired shape. It takes a bit of time but not too much and you normally do not screw things up. Wiper was supplied in the kit.
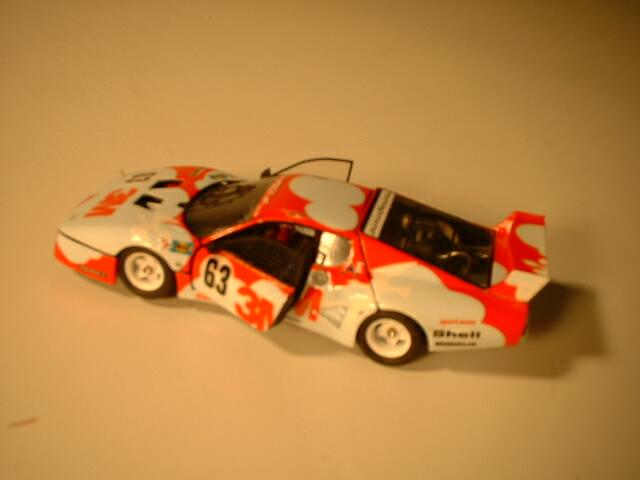
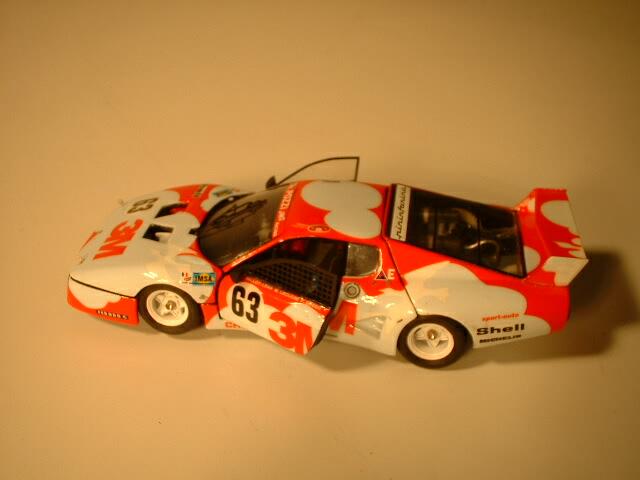
Here are the doors installed. To put them in you are supposed to drill pilot holes in the door and body and then insert a wire to connect the two.
Mirrors are resin pieces with no reflective faces. I will add some later. Window mesh is included in the kit as a PE item. Acetate is also included for the side windows
Not the best photo but there is detailing and wiring added to the area just in front of the windshield. A couple of wires and it looks nice and busy.
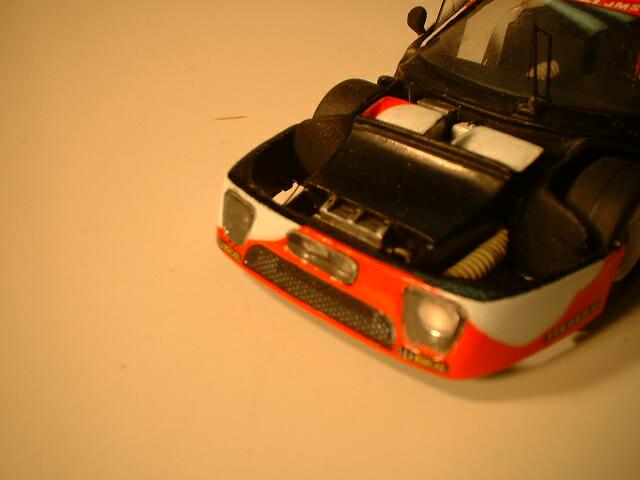
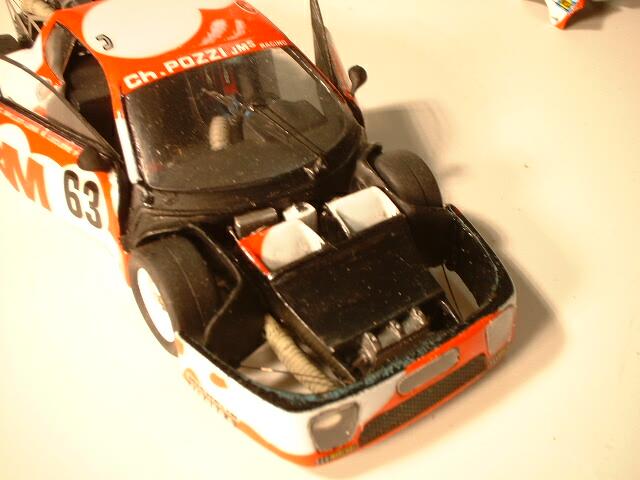
Here are the various grills and headlight installed on the front. The housing had to be pained flat black before they can be installed. To install clear parts and the PE parts I used white glue. Testors has a glue that is designed for attaching clear parts.
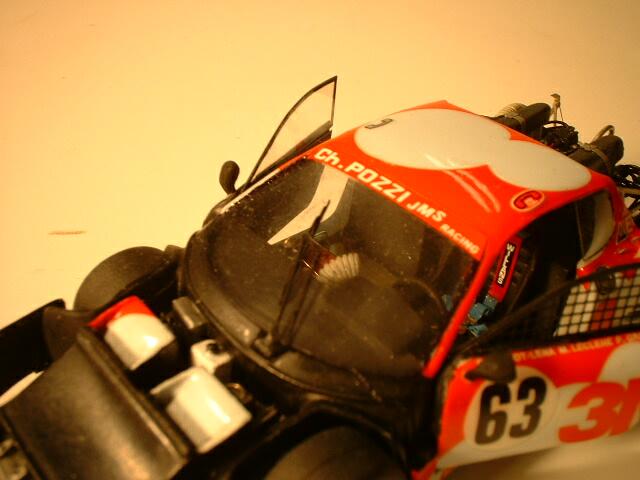
So now we go back to he windshield. The kit included windshield clips but I did not put them on as I thought they would be out of scale.
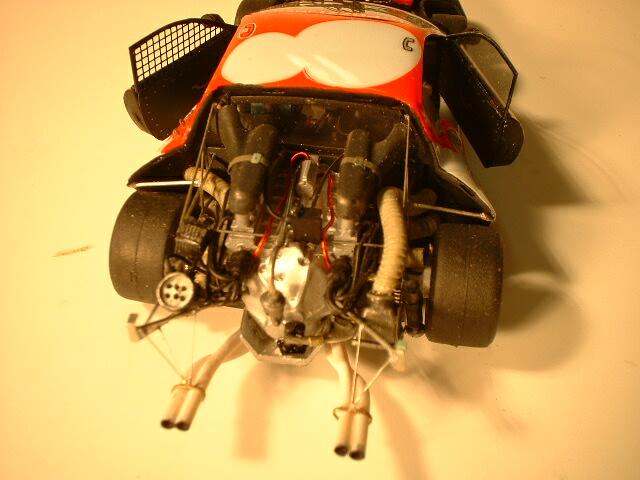
Another engine view

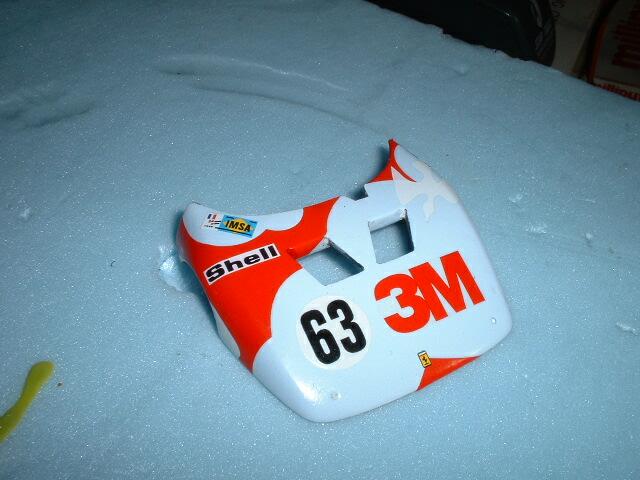
The rear deck finished. The 3M in the grill is a decal. I applied it with lots of solvaset. I then took a pin and punched out all the holes to get that look. I thin kit looks a lot better than just the decal sitting on the grill surface. The rear lights I the kit were terrible pieces. I used aftermarket items there The bottom middle red light was supplied in the kit
The hood now has the 4 hood pins installed. These are very tiny items and are easy to lose.
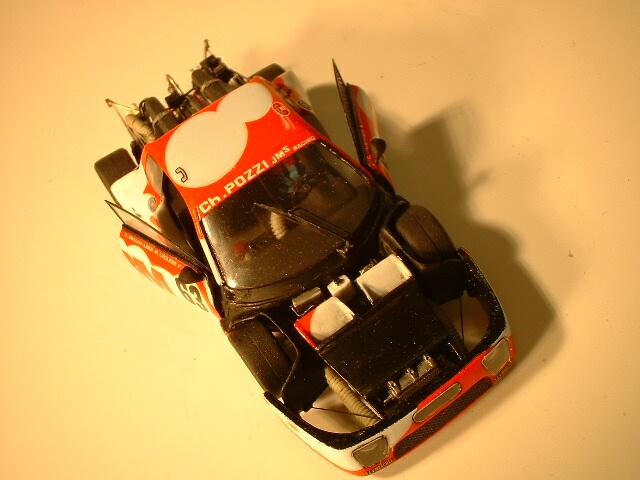
All done. Not a bad fit for the hood and rear deck.
Conclusion
Not a bad kit. Most of it was nice. I also replaced the wheel inserts. I thought the kits ones were terrible so I scratched new ones and they look a lot better Other than that and the rear lights the kit was well produced. Instructions can be a lot clearer. Quite a bit of time was wasted looking at the instructions and trying to make some sense out of them.