Click on images for larger ones. Use the back in frame button to return here
Background - Text from the Tamiya kit
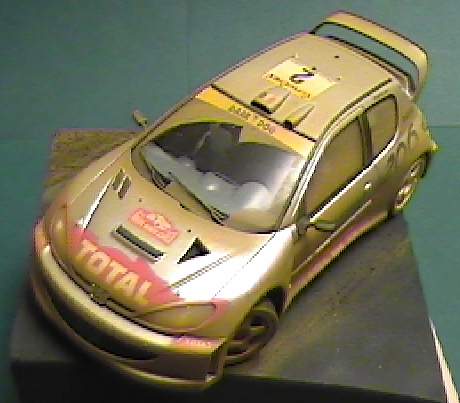
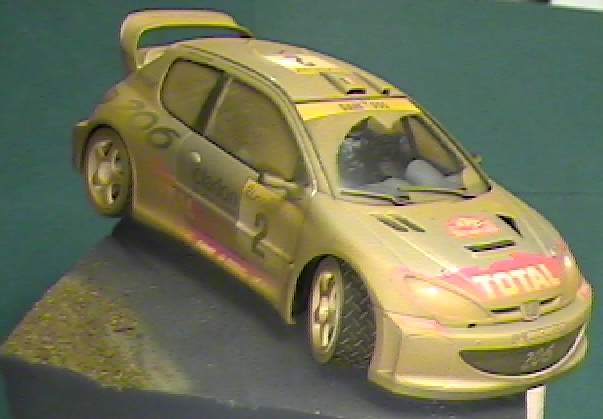
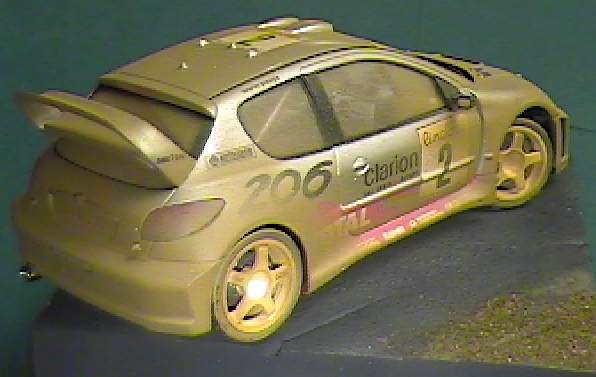
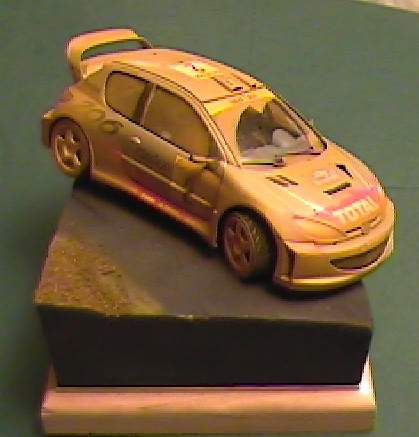
The compact Peugeot 206 WRC made it's impressive debut in the 6th race of 1999 World Rally Championship (WRC), the "Tour de Corse". When the 206 WRC entered the competition the following year, Marcus Gronholm took the drivers championship, and Peugeot acquired the Manufacturer's championship. At Monte Carlo, in the opening rally of the 2001 season, the Peugeot 206 WRC made it's appearance in the same silver paint job featured in the previous years rally, but had it's major sponsor changed from ESSO to TOTAL. In accordance with this featured change, red colouring was introduced to the hood and side of the car where the T-O-T-A-L were printed in large lettering. The cars 2 liter turbo engine, 4WD system, and longitudinal installed transmission were left unchanged, but each part was fine-tuned to push the Peugeot's competitive potential even further. In the 9th race of the WRC 2000, held in Finland, Peugeot adopted an experimental ring paddle style and semi-automatic shifters for all it's cars. This ensured minimized shifting error and enabled the driver to operate the gearshift while keeping both hands on the steering wheel. With an all star lineup for 2001, Peugeot is taking a leading roll in the 2001 World Rally Championship races. Gronholm was replaced by veteran driver Didier Auriol. This years on-road specialist is Gilles Panizzi and the off road driver is the young Harri Rovanper. At the 2nd race in Catalunya Auriol and Panizzi finished 1st and 2nd place respectively
The Kit
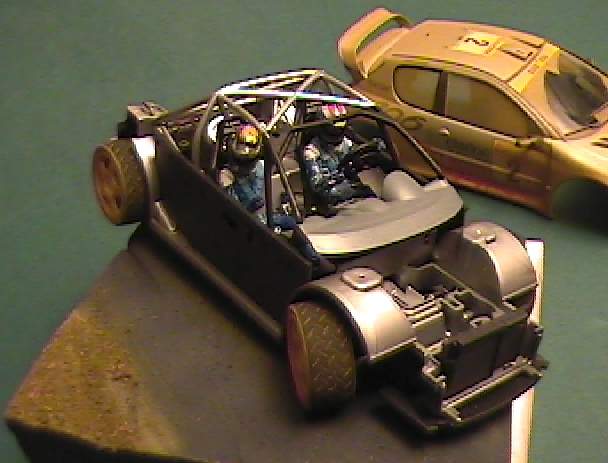
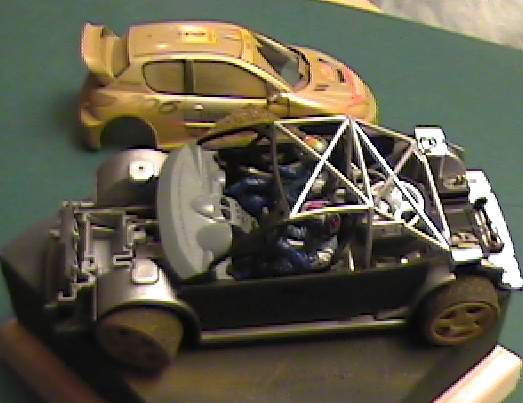
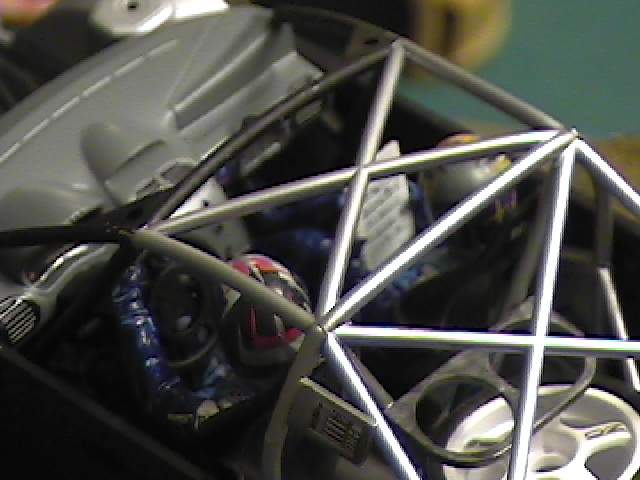
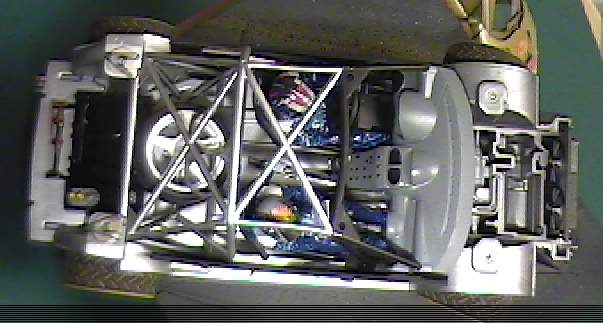
This is a curbside kit and includes no engine. However there is quite a bit of the lower portion of the engine and suspension detail. This is nicely detailed but is covered behind plates that are installed on the real car to prevent damage to the parts it covers. Tamiya has included these plates as clear parts. This allows you to see all the detail that would normally be hidden. Since this was a quick build for me I painted the plates and there is little you can see below.
Although it is a curbside there are quite a few parts for the underside and what is included look very nice. The interior is also very nicely detailed. I didn't have any references so I can not comment on the accuracy of the details and colours. A variety of decals are included for the interior. Decals are included for the CF pattern on the back of the seat as well as the seal belts. If you are going to include the seatbelts I would suggest replacing them with aftermarket items. I am also sure that the seatbelts in the real car go back to the roll cage for a mounting point.
The spare tire should be installed before the final roll cage is installed or it is a very tight fit. I placed the wheel up instead of down as in the instructions because I thought it looked better.
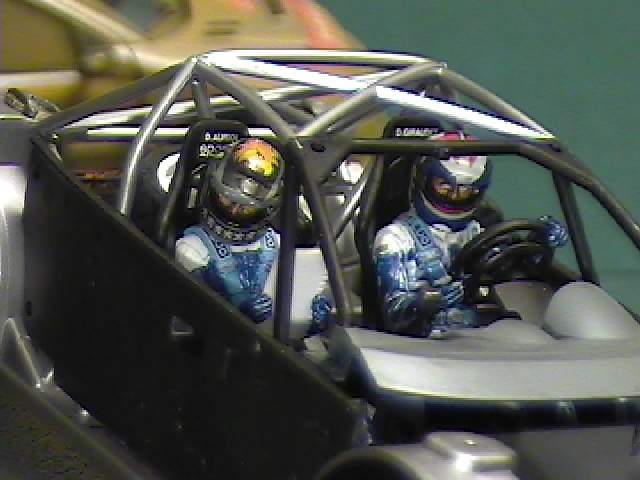
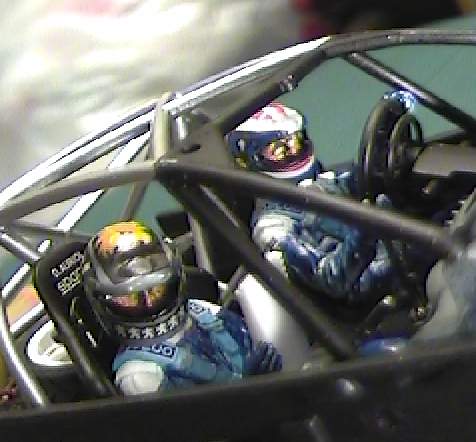
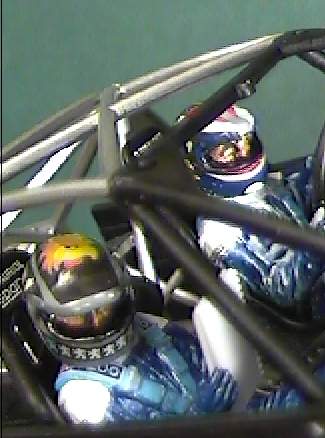
Differing from previous rally kits is the inclusion of driver figures. Included are the driver and navigator bodies in vinyl, You also get enough arms to position the driver to be going straight or turning left or right. Four sets of heads are included. These are for the driver and passenger and are open faced helmets and full face helmets. The faces are even different for the driver and passenger. Since I like to add drivers to my models when possible I decided to include these figures. Since I am not a figure painting expert I had problems painting the eyes of the figures. They always looked beady eyed. After a few failed attempts I just left the eyes white. I had some problems with the helmet decals to get the flat decals to conform to the round helmet. Solvaset was used on all the decals. These decals were fine but I have had Solvaset eat other Tamiya decals. To make my model more interesting I made the driver turning right and the heads looking right. The vinyl body and hands allows you to pop the driver figures into the seats and have the hands grab the steering wheel realistically. The only down side with vinyl is that it is hard to clean up seam lines. Close inspection will show these problems. A lot of the body is hidden so these are not a problem. The arms could be a problem so extra care should be used here.
Masks are included for the windows and are a very nice feature. I had no problems putting in the headlight body or clear covers. I used white glue to glue al the clear parts in.
A prominent part of the car is the front grill. On the box art you see the numbers 206 on the grill material. Tamiya includes this grill material as a mesh but you have to hand paint the 206 lettering in. I did this by placing the material on the guide included in the instruction sheet and using a gel pen I drew the numbers in. this worked very well.
Paints
I used the recommended Tamiya spray can for the bodyTS-17 Gloss Aluminum. Tamiya clear red was used for the rear lights. Tamiya acrylic paints was used for the interior and drivers.
Weathering
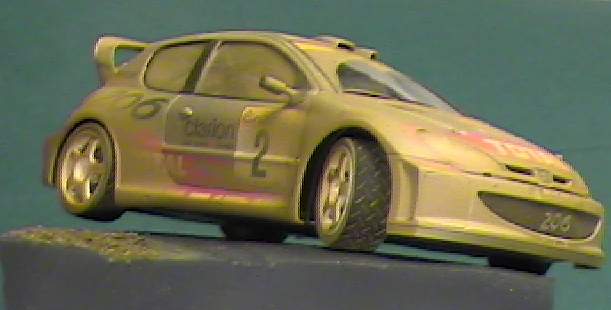
I was going to weather the model for a mini-diorama. During masking for the semi-gloss black areas of the model I managed to pull off some of the decals. I used Tamiya masking tape and I had covered the model with several coats of Future. Obviously this wasn't enough. Since these decals were destroyed and I didn't want to wait for replacement decals I decided to severely weather the model.
The first thing I did was to mask off the windshield where the wipers would run. I taped Tamiya tape to the windscreen and traced a line where I thought the wiper path would be. I then took the tape off and cut the desired shape before putting it back on the model.
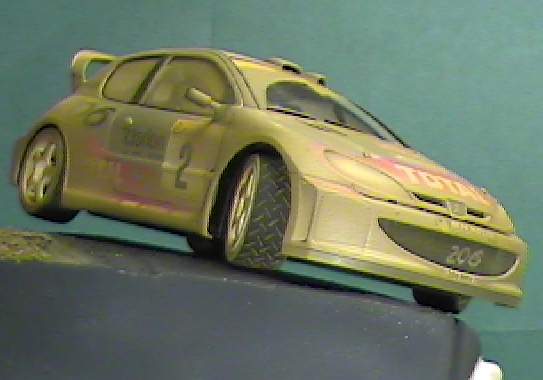
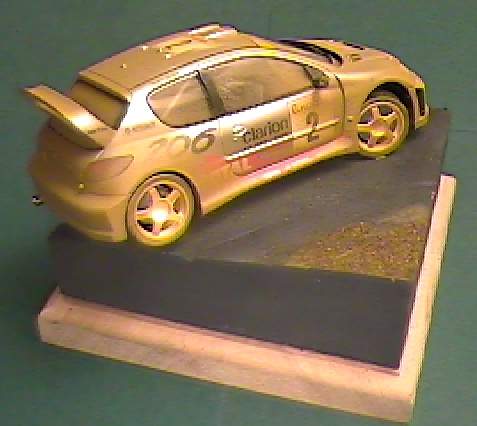
I weathered with Tamiya Desert Yellow through an airbrush. I tried to follow a pattern that I thought dirt would flow as it went over the car. If I was keener I would look for references of this car or other rally cars that were really dirty. I do know when looking at my dirty car that the front and wheel arches get a lot of dirt. I also know that the mirrors get a lot on the front face but little on the back. The rear of the car gets a lot of dirt up it's backside. On the top I managed to use the airbrush so that the areas directly behind the antenna are relatively clear.
For the tires I knew that generally the treads are clean while everything else is dirty. I airbrushed the wheels and tires and then took sandpaper and rubbing alcohol to clean the surface of the tires. I read an article where the guy used charcoal to make the tread surface really black. I also wanted to do this but did not get a chance to get some charcoal. The results look fairly good since I have left the desert yellow in the tire tread depths. Disc brakes are usually clean so I did not weather this area.
Base
I wanted to pose the model on the smallest base I can get away with and with the car looking as if it is in motion. For the base I carved up some blue Styrofoam into an interesting angle. I then airbrushed dark grey onto the base. I did not use flat black as I think this looks unreal. I then airbrushed some parts of the base desert yellow, the same colour I dirtied the car with. I then used white glue to add some dirt to the side of the diorama
Conclusion
Hey this was a fun kit to build and fit and finish of parts are excellent. Every so often I find a modern Tamiya kit that has slight fit problems but this kit is not one of them. The results look great. Seeing these cars on TV they sure look interesting and appear to be growing popularity in the model industry. The driver figures open a lot of possibilities for dioramas and the vinyl material is a good idea that works here.