Start R2-D2 No 2
Feb 16, 2010
Construction of my second R2 started a while ago but I have not posted anything on my web site or here but I thought I should start.
The plan is to have it finished for Celebration 5
I have been purchasing parts these past few years knowing I wanted to build a second R2 unit. This has spread out the cost over several years which makes the final cost much more bearable.
These are what I have so far for my second R2
Frame - A&A
Skins - Brett Fiberglass skins - purchased over 5 years ago
Radio - Spektrum DX6 - purchased a year ago for $60
Drive Speed controllers - Vantec - purchased off ebay a couple of years ago
Dome - R&J aluminum dome - got it at a good price because it is only the top part with no rings
Drive motors - 24V scooter motors - purchased when scooters were dirt cheap locally
Drive Assembly - H&A drive system that will be modified to use the scooter motors
I plan to use a car window power slide for my middle leg drop and an electric linear actuator for the body tilt.
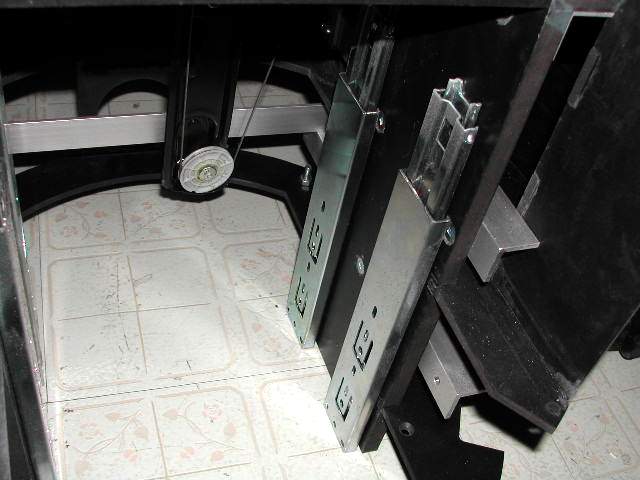
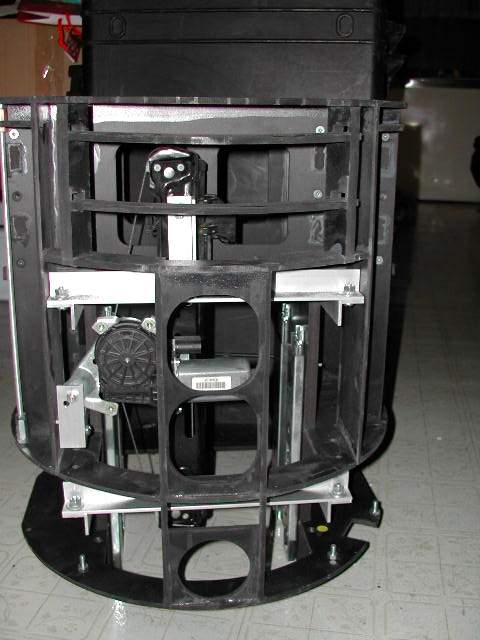
I am using 4 modified Lee Valley Tools 12 inch 3 segment drawer slides to guide the middle leg up and down. The largest segment has been cut short to get the necessary travel needed for the 3rd leg drop. I am getting 11 inches of travel which is slightly more then what I need. Here are 2 of the drawer slides. Note that the drawer slides are retracted when the middle leg is in the down position. This is when the drawer slides are the strongest and when the middle legs will see the most loads. This view is from the rear door of the A&A frame
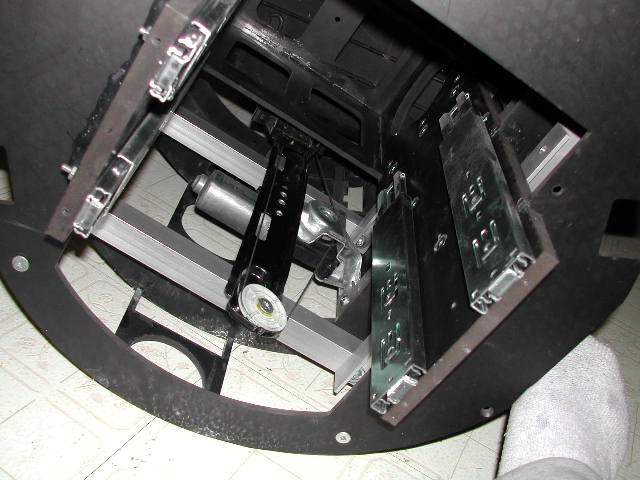
Here is a bottom view of the frame showing the drawer slides in the leg down position or drawer slide retracted position
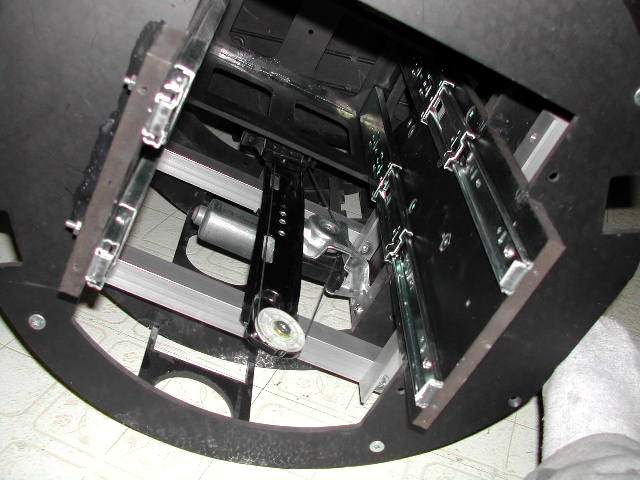
And now the drawer slides are extended which translates into the middle leg being retracted into the body.
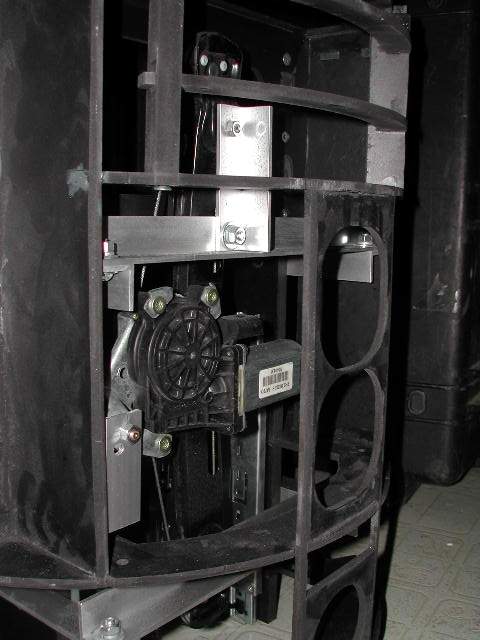
You can see it in the other photos but this assembly is the power window slide that I am using to raise and lower the 3rd leg. Currently I do not know if this assembly is strong enough to keep the 3rd leg down by itself or if I need to have another mechanism to lock the 3rd leg in the down position.
Here is a front view of the power window slide and the aluminum angle I used to mount the power window slide to the frame
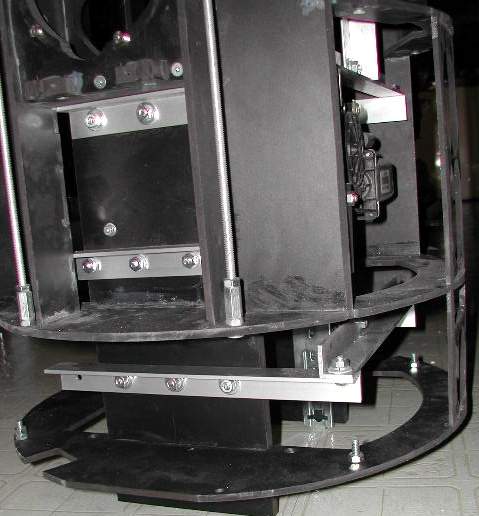
There are 3 mounting points to the power window slide so I created 3 mounting points using the aluminum angle. As an added benefit the aluminum angle also helps to strengthen the frame.

A problem with the Fiberglass skins is that they bow out from the frame. It takes quite a bit of force to get it to conform to the frame. Using straps and a ratchet system this showed me that it took quite a bit of force to get the skins to conform to the frame. I knew something had to be done
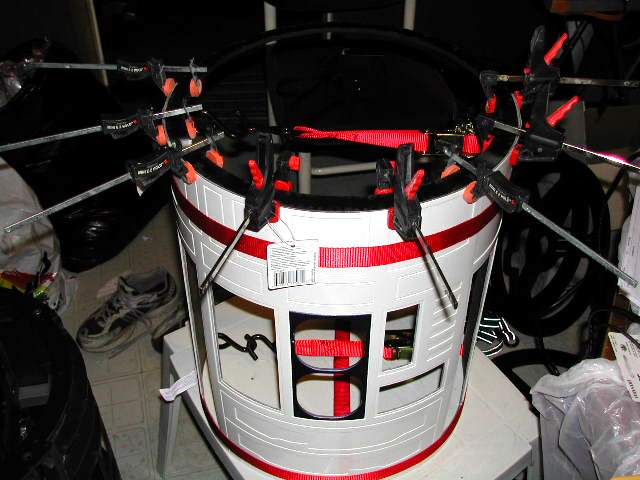
I used a heat gun and I tried several times to bend the skins so the fit to the frame would be better. Most attempts failed until I found this ring that I could clamp to the skins as I heated up the skins. This seems to have worked.